| Author | Thread |
|
|
08/14/2014 01:31:32 PM · #51 |
|
|
|
08/22/2014 09:39:02 PM · #52 |
 ... ... ... ... came from came from  (I do like the New York Times) (I do like the New York Times) |
|
|
|
08/23/2014 12:16:23 AM · #53 |
Promoting Propaganda Poster Challenge Idea …

Here ... |
|
|
|
08/23/2014 02:34:39 PM · #54 |
who knows when an old Windsock might come in handy:
Original: 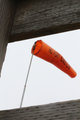 turns into: turns into: 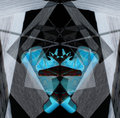 .... ....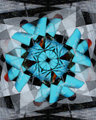 .... ....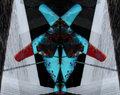 .... ....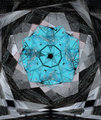 |
|
|
|
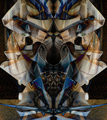
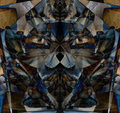
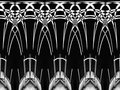
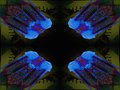
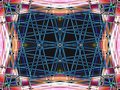
08/23/2014 07:38:08 PM · #55 |
It occurs to me that an additional element of randomness might be introduced by posting at least one variation based on any challenge entries we submit, like these based on my entry to the recent Toothpick Challenge:
 Variations: Variations: 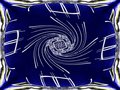 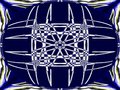 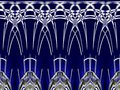 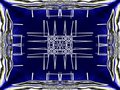
     |
|
|
|
08/24/2014 12:55:09 AM · #56 |
I think it's been about 2 months since I've done one of these. It feels like years.
Message edited by author 2014-08-24 00:57:21. |
|
|
|
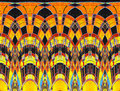
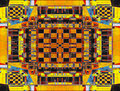
08/24/2014 12:51:24 PM · #57 |
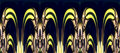
Based on entry for Perspective challenge: Variations: Variations: 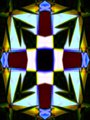 
|
|
|
|
08/24/2014 02:10:04 PM · #58 |
I had this in another thread but I guess this is the active one?
Alice and Paul, your both doing fascinating stuff, and Pixelpig, that's a fine one!
Message edited by author 2014-08-24 14:10:57. |
|
|
|
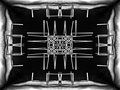
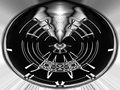
08/31/2014 12:53:26 AM · #59 |
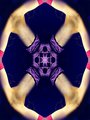
Challenge entry:  Variations: Variations: 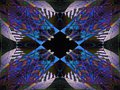
    |
|
|
|
08/31/2014 01:38:45 AM · #60 |
OK I finally gave this a shot and this is what I ended up with, pretty cool technique.
 |
|
|
|
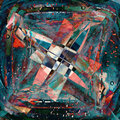
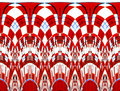
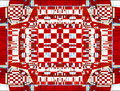
08/31/2014 03:36:00 PM · #61 |
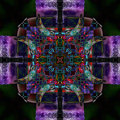
Challenge Entry:  Examples: Examples: 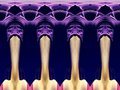
    More Variations: More Variations: |
|
|
|
08/31/2014 07:20:12 PM · #62 |
|
|
|
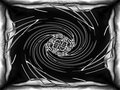
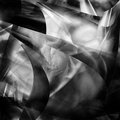
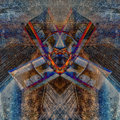
09/08/2014 02:52:53 PM · #63 |
One day, when playing around in the Actions area, I accidentally wrote over some of my flip n blend action.
With all the little tweaks I've added through the years, I was worried. but needlessly, as those instructions:
Open the image you want to edit and make sure the layers palette is visible.
Duplicate the background layer
From the edit menu, choose transform and select flip horizontal
Change the blending mode of the layer to difference.
From the layers menu, choose flatten
Duplicate the background layer
From the edit menu, choose transform and select flip vertical
Change the blending mode of the layer to difference.
From the layers menu, choose flatten
Duplicate the background layer
From the edit menu, choose transform and select rotate 90 degrees (CW or CCW doesn't matter)
Change the blending mode of the layer to difference.
From the layers menu, choose flatten
worked just fine in putting the action back in and working.
This free study image from a couple of months ago is the proof.
Of course, I also added a spiral or two into the mix. I'm glad those were not affected,
as the spiral actions are much harder to reconstruct.
 .... .... |
|
|
|
09/11/2014 09:41:21 AM · #64 |
|
|
|
09/11/2014 01:29:43 PM · #65 |

@ sfalice
I like your notes. Glad you remembered, though you know we would all help. I do just the opposite, treating each one as a sort of improv session. The neat thing about this is that everyone can create their own unique workflow & we all get awesome results. |
|
|
|
10/02/2014 07:02:28 PM · #66 |
Recent entry:  Variations: Variations:
    |
|
|
|
01/07/2015 01:49:31 PM · #67 |
It's back ... Original: 
Variations:  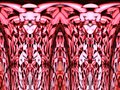 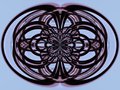 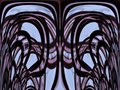 |
|
|
|
01/10/2015 01:59:14 PM · #68 |
|
|
|
01/31/2015 02:22:49 PM · #69 |
 
  
Thank you,  GeneralE, for this new addiction... :-) GeneralE, for this new addiction... :-)
Message edited by author 2015-01-31 14:23:15. |
|
|
|
01/31/2015 02:47:31 PM · #70 |
And, because once you start it's hard to stop...

  |
|
|
|
01/31/2015 04:41:07 PM · #71 |
Originally posted by Elaine:
And, because once you start it's hard to stop... |
Just don't say you weren't warned! :-) |
|
|
|
01/31/2015 10:46:26 PM · #72 |
Just threw one together a minute ago, been a while...
 |
|
|
|
02/01/2015 06:42:38 AM · #73 |
I tried Flip and Bend after reading the threads several times. It took me a while to find a photo that gives nice results in the end - most of them are too dark and too much details, which end up as messy... for me it is not that easy as assumed.
Today it was the first time I was kind of satiesfied with my results:
 ended up like this ended up like this 
and
 came out like this came out like this 
How do you pick a image as a base? What are your criteria?
Do you stick to the basic instruction or do you make alterations in between as f.e. shifting the layers?
I'm just curious
|
|
|
|
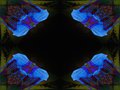
02/01/2015 11:49:16 AM · #74 |
Originally posted by primabarbara:
How do you pick a image as a base? What are your criteria?
Do you stick to the basic instruction or do you make alterations in between as f.e. shifting the layers?
I'm just curious |
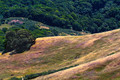
The source image you used here is a good example. Straight lines on an angle, solid shapes, not too many colors or gradients seem to be the key.
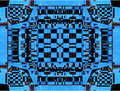
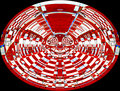
My main deviations from the basic instructions are using various blend modes (not just Difference), depending on the effect produced. I also use Curves adjustment layers to perk up the colors, sometimes as an interediate step before duplicating and flipping a layer.
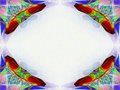
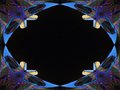
Once I have one-three variations made with the Horizontal/Vertical/Rotate steps I try some of the Distortion filters, mostly combinations of the Polar Coordinates filter. The "ovals" are made by running the filter in Polar-to-Rectangular mode, rotating the image 180°, and then running the filter in R>P mode. If you run the filter with the opposite sequence (R?P, rotate, then P>R) you turn the original "inside-out".
 Source image Source image
 Basic process Basic process
 P>R P>R
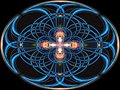 Basic plus P>R, Rotate, R>P Basic plus P>R, Rotate, R>P
 Basic plux R>P, Rotate, P>R Basic plux R>P, Rotate, P>R
ETA: A lot of people resize or crop the image to a square before processing. I've been leaving mine in the original 4:3 aspect ratio, but this involved disproportionate resizing when performing the 90° rotation, the width to 70% and the height to 133.33% (for a landscape-oriented picture).
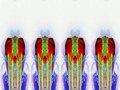
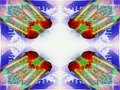
Also, these (especially the P>R variation) can be pieced together to make borders or frames:
Message edited by author 2015-02-01 11:59:58. |
|
|
|
02/01/2015 12:15:52 PM · #75 |
Originally posted by primabarbara:
I tried Flip and Bend after reading the threads several times. It took me a while to find a photo that gives nice results in the end - most of them are too dark and too much details, which end up as messy... for me it is not that easy as assumed. |
Did you know---colors in the computer are actually hexadecimal numbers. The number for black is 0.0.0. Photoshop uses math on the color numbers when blending, which is why it's a good idea to avoid black. Add or subtract 0 from any color number=nothing happens. Multiply by 0 = zero. Divide by 0 = infinity.
Photos that don't have any dark colors do better, as you have discovered.
When cropping, pay attention to the center of your comp. You're going to be rotating your image around the center point, so the detail there should be chosen with rotation in mind. |
|
Home -
Challenges -
Community -
League -
Photos -
Cameras -
Lenses -
Learn -
Help -
Terms of Use -
Privacy -
Top ^
DPChallenge, and website content and design, Copyright © 2001-2026 Challenging Technologies, LLC.
All digital photo copyrights belong to the photographers and may not be used without permission.
Current Server Time: 01/12/2026 07:29:47 AM EST.


