| Author | Thread |
|
|
12/10/2010 12:12:10 PM · #326 |
Progressions, indeed! And how we progress in our different ways.
Paul those patterns of yours are a delight to look at and you have the patience of a saint to post them all. As usual, Marion, your creations are original and fun.
My "take" today is to superimpose those shape thingees in PS (represented by that little blob-hence the image names). I especially like the little world that turns into a spider.
 ... ... ... ... ... ... |
|
|
|
12/10/2010 01:26:56 PM · #327 |
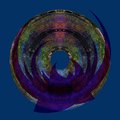
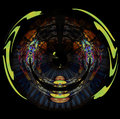
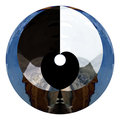
Here's a mystery flipper; bonus points to s/he who can identify the (recent) source image out of my portfolio, and for the matter of that, can anyone figure out how it was created from same?
R.
|
|
|
|
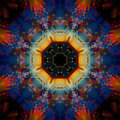
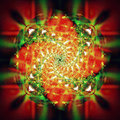
12/10/2010 02:19:20 PM · #328 |
Originally posted by GeneralE:
Originally posted by jomari:
Love the progression. |
oooh ... now you're gonna pay for that remark! ;-)
I've been shooting things with geometric shapes and fairly sharp lines for this purpose, and had a chance to shoot some grillwork and some pipes yesterday. As it turns out, there are both interesting changes introduced by the flipping and rotation, but, more than in any other one of these I've seen, several blending modes seemed to "work" ... I think I can link the steps/mode for each.
Also, that Polar Coordinates filter is pretty interesting -- besides the usual version, I've also tried using the opposite "Polar to Rectangular" setting once or twice, and then sometimes the regular "Rectangular to Polar" after that.
I have three humongous sets to post ... I'm finding it hard to pick favorites to print ... :-(
Source image: 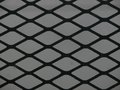
Horizontal only: 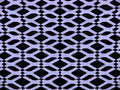 Horizontal + Vertical: Horizontal + Vertical:  Hor. + Vert., Rotated/no blend: Hor. + Vert., Rotated/no blend: 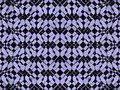
H+V, Rotated, Blend = Multiply: 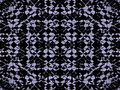 Blend = Screen: Blend = Screen: 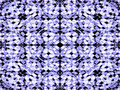 Blend = Overlay: Blend = Overlay: 
Blend = Hard Light: 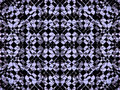 Blend = Color Burn: Blend = Color Burn: 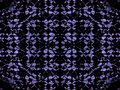 Blend = Darken: Blend = Darken: 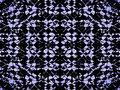
Blend = Lighten: 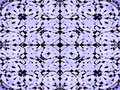 Blend = Difference: Blend = Difference: 
Blend = Exclusion: 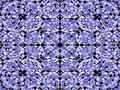 Blend = Difference + Rect->Polar: Blend = Difference + Rect->Polar: 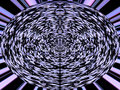
Rect->Polar applied twice: 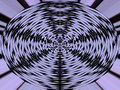 Polar->Rect: Polar->Rect: 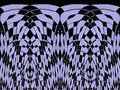
Polar->Rect (twice): 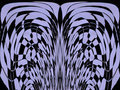 Previous image + Rect-Polar: Previous image + Rect-Polar:  |
All those variations make me think about cryptography, it would be an artistic way to encode secret messages. |
|
|
|
12/10/2010 02:52:11 PM · #329 |
Originally posted by Bear_Music:
Here's a mystery flipper; bonus points to s/he who can identify the (recent) source image out of my portfolio, and for the matter of that, can anyone figure out how it was created from same?
R. |
I give up !
I think that you try to hypnotize us... lol
I really like the photo, it's like a fountain with jets of fire, then ice and finally water. Great ! |
|
|
|
12/10/2010 06:49:43 PM · #330 |
Originally posted by Mambe:
Originally posted by Bear_Music:
Here's a mystery flipper; bonus points to s/he who can identify the (recent) source image out of my portfolio, and for the matter of that, can anyone figure out how it was created from same?
R. |
I give up !
I think that you try to hypnotize us... lol
I really like the photo, it's like a fountain with jets of fire, then ice and finally water. Great ! |
Hint: It's a recent challenge entry. By "recent", I mean RECENT :-)
R. |
|
|
|
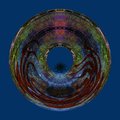
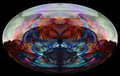
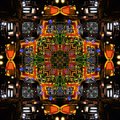
12/10/2010 08:20:40 PM · #331 |
Originally posted by Bear_Music:
Originally posted by Mambe:
Originally posted by Bear_Music:
Here's a mystery flipper; bonus points to s/he who can identify the (recent) source image out of my portfolio, and for the matter of that, can anyone figure out how it was created from same?
R. |
I give up !
I think that you try to hypnotize us... lol
I really like the photo, it's like a fountain with jets of fire, then ice and finally water. Great ! |
Hint: It's a recent challenge entry. By "recent", I mean RECENT :-)
R. |
Could it be this one: 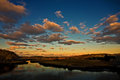
|
|
|
|
12/10/2010 09:01:51 PM · #332 |
Holy cow, impressive things have been happening while I wasn't paying attention! That's what I get for sleeping in class! "D
Message edited by author 2010-12-10 21:19:12. |
|
|
|
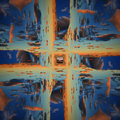
12/10/2010 09:07:20 PM · #333 |
Originally posted by Bear_Music:
Here's a mystery flipper; bonus points to s/he who can identify the (recent) source image out of my portfolio, and for the matter of that, can anyone figure out how it was created from same?
R. |
this one?
 |
|
|
|
12/10/2010 09:11:49 PM · #334 |
Originally posted by cpanaioti:
Could it be this one: |
Bingo! Now, any clues how to get from here to there needed? It was a weird transformation...
R. |
|
|
|
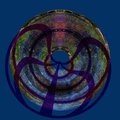
12/10/2010 10:33:28 PM · #335 |
Originally posted by Bear_Music:
Originally posted by cpanaioti:
Could it be this one: |
Bingo! Now, any clues how to get from here to there needed? It was a weird transformation...
R. |
You appear to have removed a previous transformation which I believe was the starting point for this latest creation.
Message edited by author 2010-12-10 22:35:24.
|
|
|
|
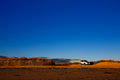
12/10/2010 10:38:52 PM · #336 |
 Hey, Robert, guess where I took this. Hey, Robert, guess where I took this.
Message edited by author 2010-12-10 22:53:14. |
|
|
|
12/11/2010 02:15:34 AM · #337 |
Well, it's a McDonalds obviously, but that can't be what you're asking?
R. |
|
|
|
12/11/2010 02:24:38 AM · #338 |
Originally posted by cpanaioti:
You appear to have removed a previous transformation which I believe was the starting point for this latest creation.
|
Nah... The source image for that one was similar, one of the series I was shooting, but I worked from a different source image, the Free Study one, for the current transformation.
What I did was start by making a new canvas twice as long and twice as wide as the source image. Pasted the source image in upper left. Copied, pasted, flipped vertically, moved to lower left. Pasted, flipped horizontally, moved to upper right. Pasted, flipped horizontally and vertically, moved to lower right. Merged first two (left side) into a single layer, and second pair (right side) into another layer.
Now I used the crop tool constrained to square to draw a square crop from left margin. While the handles were showing, I pulled guidelines to mark right edge and horizontal/vertical centers, then canceled crop. Next I dragged the right-side elements to the left until the right edge was flush with the right guideline, and the rest of the image to the right was empty. Drew the crop again, and cropped to square. Set the over-layer I'd just dragged to "Lighter Color" mode.
At this point I had a base layer that had a darker, vertical center panel and two matching, lighter left-and-right panels. This was my departure point for, first, a copy layer rotated 90 degrees and set to darker color mode, then a copy of THAT rotated 45 degrees and set to Lighter Color, then a copy of THAT set to soft light mode, and this was the result.
R.
Message edited by author 2010-12-11 02:27:15. |
|
|
|
12/11/2010 05:13:35 AM · #339 |
Originally posted by Bear_Music:
Well, it's a McDonalds obviously, but that can't be what you're asking?
R. |
Yep, that's all. Just being silly. |
|
|
|
12/11/2010 09:21:50 AM · #340 |
Originally posted by Bear_Music:
Originally posted by cpanaioti:
You appear to have removed a previous transformation which I believe was the starting point for this latest creation.
|
Nah... The source image for that one was similar, one of the series I was shooting, but I worked from a different source image, the Free Study one, for the current transformation.
What I did was start by making a new canvas twice as long and twice as wide as the source image. Pasted the source image in upper left. Copied, pasted, flipped vertically, moved to lower left. Pasted, flipped horizontally, moved to upper right. Pasted, flipped horizontally and vertically, moved to lower right. Merged first two (left side) into a single layer, and second pair (right side) into another layer.
Now I used the crop tool constrained to square to draw a square crop from left margin. While the handles were showing, I pulled guidelines to mark right edge and horizontal/vertical centers, then canceled crop. Next I dragged the right-side elements to the left until the right edge was flush with the right guideline, and the rest of the image to the right was empty. Drew the crop again, and cropped to square. Set the over-layer I'd just dragged to "Lighter Color" mode.
At this point I had a base layer that had a darker, vertical center panel and two matching, lighter left-and-right panels. This was my departure point for, first, a copy layer rotated 90 degrees and set to darker color mode, then a copy of THAT rotated 45 degrees and set to Lighter Color, then a copy of THAT set to soft light mode, and this was the result.
R. |
Hi, Robert. I'm reading this with great interest. Thanks for posting the steps. It's amazing & fascinating to see the interesting new directions people take this. I'm wondering what your thinking was when you started this, were you playing with the image to see what would happen or maybe the idea came first & you worked out the steps to achieve it? I'm thinking of photography in new ways these days, which I enjoy very much. Thanks to you & everyone here for the inspiration! |
|
|
|
12/11/2010 10:11:49 AM · #341 |
Originally posted by pixelpig:
I'm wondering what your thinking was when you started this, were you playing with the image to see what would happen or maybe the idea came first & you worked out the steps to achieve it? |
I chose the image with this approach to the processing in mind. I didn't know exactly how it was going to turn out, but I knew the steps I wanted to take and the kind of image I wanted to use them on. The "different" part of this was the compositing of 4 mirrored images into one and then the overlapping slide to make a square.
R. |
|
|
|
12/11/2010 10:38:58 AM · #342 |
Originally posted by Bear_Music:
Originally posted by pixelpig:
I'm wondering what your thinking was when you started this, were you playing with the image to see what would happen or maybe the idea came first & you worked out the steps to achieve it? |
I chose the image with this approach to the processing in mind. I didn't know exactly how it was going to turn out, but I knew the steps I wanted to take and the kind of image I wanted to use them on. The "different" part of this was the compositing of 4 mirrored images into one and then the overlapping slide to make a square.
R. |
Thanks. Instead of cropping the original, then, you re-arranged the original to make the starting square you wanted. I would love to try this right now. Sigh. I have chores to do, then I have to go to work. No access to DPC at work except on my iphone. But, thanks a lot. |
|
|
|
12/11/2010 11:50:48 AM · #343 |
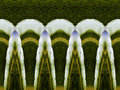
I continue to be fascinated by the evolution of ideas in this Thread.
Lots to ponder here. And thank you for posting steps and concepts.
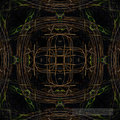
Here's another of my "Shapes" progressions.
 |
|
|
|
12/11/2010 07:00:57 PM · #344 |
Still getting interesting effects from using the Polar Coordinates filter "backwards" (Polar-to-Rectangular) ... in case it hasn't been clear I often use tine Curves to adjust color and contrast, and for some of these I boosted the Saturation as well.Source image: 
Horizontal and Vertical flips only: 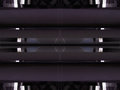
Derivatives: 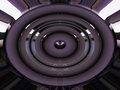  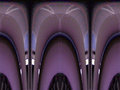 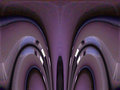 
Hor., Vert., plus Rotated layer: 
Derivatives: 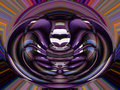 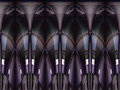  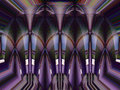 |
|
|
|
12/11/2010 09:19:30 PM · #345 |
 original to these original to these   
Message edited by author 2010-12-11 21:44:52. |
|
|
|
12/12/2010 09:02:54 AM · #346 |
I got some nice shots driving home in the rain last night & tried Robert's steps out.
Original
.
All I changed in Robert's steps was the blending modes at the end. Then I copied the finished layer, inverted it, & blended it on Darken to get the black lines.
For comparison, I also did a more standard flip'n'blend.
Message edited by author 2010-12-12 09:06:52. |
|
|
|
12/12/2010 12:04:27 PM · #347 |
Off on another tangent:
 ...variation on the seascape : ...variation on the seascape :  ...and yet another: ...and yet another: 
Approximate steps:
1.Divide image in half on the diagonal; paint one half white.
2. Perform flip n blend
3. flip image CW 90°
4. add canvas (white) to top and bottom
5. Perform polar coordinates
6. Make square (optional)
Message edited by author 2010-12-12 13:28:41. |
|
|
|
12/12/2010 02:17:09 PM · #348 |
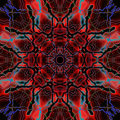
From a few twigs sticking out of a small pond.
|
|
|
|
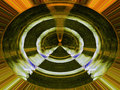
12/12/2010 11:08:13 PM · #349 |

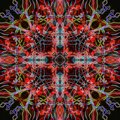
Polar coordinates and a couple of flips later, I created an Easter egg:

Message edited by author 2010-12-12 23:21:33.
|
|
|
|
12/13/2010 04:17:39 AM · #350 |
Took a picture of a moving rain this (Sunday) evening ... after the basic F/B steps, used Polar Coordinates in both directions once and twice, then combined them -- color and contrast tweaked a bit as usual.Source image: 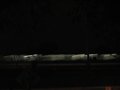 Basic Hor., Vert., and Rotation steps: Basic Hor., Vert., and Rotation steps: 
     |
|
Home -
Challenges -
Community -
League -
Photos -
Cameras -
Lenses -
Learn -
Help -
Terms of Use -
Privacy -
Top ^
DPChallenge, and website content and design, Copyright © 2001-2026 Challenging Technologies, LLC.
All digital photo copyrights belong to the photographers and may not be used without permission.
Current Server Time: 07/17/2026 02:53:46 PM EDT.


