| Author | Thread |
|
|
04/15/2014 10:10:17 PM · #626 |
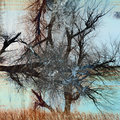
I love you guys! I was lucky enough to notice this thread yesterday - and it peaked my interest enough that I saved the page where the instructions were so I could try it out. What fun. I'll keep working to understand the whole color thing - it seems like wild colors can result. But I had some success. (Beads, Trees, Windmills).
   |
|
|
|
04/16/2014 02:11:41 PM · #627 |
|
|
|
04/26/2014 06:26:02 PM · #628 |
|
|
|
04/27/2014 01:07:27 PM · #629 |
|
|
|
04/30/2014 07:53:53 PM · #630 |
|
|
|
04/30/2014 09:15:00 PM · #631 |
I am really enjoying these!!!! It is soo cool how you do that, if I knew how I would join ya but I will be lurking and watching LOLOL
|
|
|
|
04/30/2014 09:29:28 PM · #632 |
From the original thread:
Originally posted by cpanaioti:
The Instructions:
In PS I do the following: (Gimp probably has something similar)
These instructions are for PS CS3 but may very well work for other versions of PS and maybe for other software.
Open the image you want to edit and make sure the layers palette is visible.
Duplicate the background layer
From the edit menu, choose transform and select flip horizontal
Change the blending mode of the layer to difference.
From the layers menu, choose flatten
Duplicate the background layer
From the edit menu, choose transform and select flip vertical
Change the blending mode of the layer to difference.
From the layers menu, choose flatten
Duplicate the background layer
From the edit menu, choose transform and select rotate 90 degrees (CW or CCW doesn't matter)
Change the blending mode of the layer to difference.
From the layers menu, choose flatten
crop to square (not always)
As you can see from the banter in this thread, these are only a starting point. Change them up, experiment and have fun.
Depending on the image, you may need to make adjustments in between flips and/or at the end as it may end up quite dark.
I tend to do selective exposure adjustments at the end to bring out the amazing detail in the center of the final image. I do this in Lightroom.
I've got this in an action now (everything but the crop) so I can see what an image will produce rather quickly
I've discovered that the plainest images usually produce the best results.
If you can't operate on layers individually then the duplicate steps can be to duplicate the image (in a separate file) then paste it in as a new layer before blending. |
These are the basic instructions, but over the years we've tried many variations, especially in changing blending modes at various stages, and color-shifting (I use Curves Adjustment Layers myself). |
|
|
|
05/10/2014 05:19:15 PM · #633 |
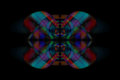
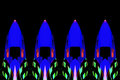
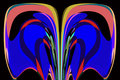
As long as we're suggesting new challenges, how about a "Flip/Blend Abstract" challenge?Original art:  More Variations: More Variations: 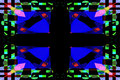 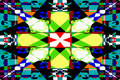
     |
|
|
|
05/10/2014 06:44:24 PM · #634 |
Originally posted by GeneralE:
As long as we're suggesting new challenges, how about a "Flip/Blend Abstract" challenge? |
Great idea.
+1 |
|
|
|
05/11/2014 01:02:26 PM · #635 |
|
|
|
05/16/2014 06:54:51 AM · #636 |
Originally posted by GeneralE:
From the original thread:
Originally posted by cpanaioti:
The Instructions:
In PS I do the following: (Gimp probably has something similar)
These instructions are for PS CS3 but may very well work for other versions of PS and maybe for other software.
Open the image you want to edit and make sure the layers palette is visible.
Duplicate the background layer
From the edit menu, choose transform and select flip horizontal
Change the blending mode of the layer to difference.
From the layers menu, choose flatten
Duplicate the background layer
From the edit menu, choose transform and select flip vertical
Change the blending mode of the layer to difference.
From the layers menu, choose flatten
Duplicate the background layer
From the edit menu, choose transform and select rotate 90 degrees (CW or CCW doesn't matter)
Change the blending mode of the layer to difference.
From the layers menu, choose flatten
crop to square (not always)
As you can see from the banter in this thread, these are only a starting point. Change them up, experiment and have fun.
Depending on the image, you may need to make adjustments in between flips and/or at the end as it may end up quite dark.
I tend to do selective exposure adjustments at the end to bring out the amazing detail in the center of the final image. I do this in Lightroom.
I've got this in an action now (everything but the crop) so I can see what an image will produce rather quickly
I've discovered that the plainest images usually produce the best results.
If you can't operate on layers individually then the duplicate steps can be to duplicate the image (in a separate file) then paste it in as a new layer before blending. |
These are the basic instructions, but over the years we've tried many variations, especially in changing blending modes at various stages, and color-shifting (I use Curves Adjustment Layers myself). |
Thanks Paul!! Much appreciated.. this is wayyy too advanced for me LOL |
|
|
|
05/21/2014 10:42:02 AM · #637 |
| Thanks for the instructions. I was looking for a tutorial, but this seems like a good starting point (and is enough for me). |
|
|
|
08/11/2014 11:01:15 AM · #638 |
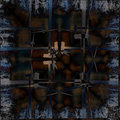
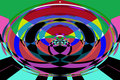
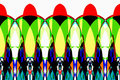
This was a morning to be used to get the creative juices flowing - so here are those deviled eggs again, scrambled up a bit.
They are a mixture of F&B and rotations.
 .=. .=. .... ....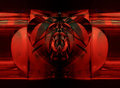 .... ....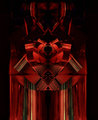 |
|
|
|
08/11/2014 12:48:26 PM · #639 |
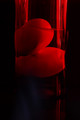
Gorgeous! Love the red. Don't forget about this thread. |
|
|
|
08/11/2014 01:52:02 PM · #640 |
|
|
|
08/11/2014 02:14:28 PM · #641 |
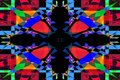
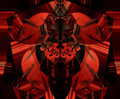
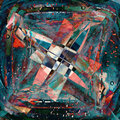
I took my disaster of a "1 into 2" challenge entry and made this from it:
 |
|
Home -
Challenges -
Community -
League -
Photos -
Cameras -
Lenses -
Learn -
Help -
Terms of Use -
Privacy -
Top ^
DPChallenge, and website content and design, Copyright © 2001-2026 Challenging Technologies, LLC.
All digital photo copyrights belong to the photographers and may not be used without permission.
Current Server Time: 04/27/2026 05:26:43 PM EDT.


