|
| Author | Thread |
|
|
03/18/2011 04:28:43 PM · #1 |
I've been asked, in the image comments section, to provide a step-by-step on the creation of this image, which just took the blue ribbon in the "Day Taken at Night" challenge:
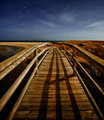
To begin with, I have quite a bit of experience over the years at doing shots like this, as they are a staple of architectural photography, albeit usually shot in twilight lighting, not near blackness. But I'm comfortable working in really low light situations. It's made even easier by the fact that I shoot with a Canon 5D, which is an exemplary low-light-level camera. In the event, I wasn't really planning to shoot for this challenge, but  PennyClick motivated me out, and suggested this location: the rest is serendipity. PennyClick motivated me out, and suggested this location: the rest is serendipity.
*******************

This is the original image before RAW processing, viewed with ACR (Adobe Camera Raw) defaults. It is deliberately underexposed because I don't want the stars blowing out And because a slightly darker image will work best for what I have in mind.

This is the RAW image as processed in ACR and exported to CS5 ΓΆ€” Note that it is still relatively flat, unsaturated, and dark. This is because I will be doing key enhancements in Nik HDR Efex pro, and experience has taught me that it will work better if I start with this sort of original.

Here I have used the skew tool in CS5 to square up the boards on the bridge and the horizon. The adjustment is pretty subtle. Amazingly, I had it nearly square setting up in near pitch-darkness, using only the levels on my tripod as guides.
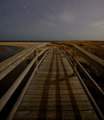
Now I have made the first big change, cropping the image (as planned) to bring the horizon to the 1/3 line. Doing this also allows me to use a more-squared image, gaining valuable real estate within the DPC size limitations, and allowing me to showcase the excellent detail of the image.
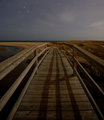
Here I have run noise removal, Topaz DeNoise. It's not so much that the image NEEDED noise removal, as it stood, but that the HDR tone mapping I have planned will exaggerate any noise that is present, especially in the blue tones, and I want a buttery smooth image, not a grainy one, so a little preemptive noise removal is called for. The 5D, of course, is exceptionally low-noise in the first place, and that's part of why this image works so well.
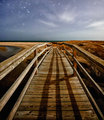
Alright, here's the biggie :-) Nik HDR Efex Pro. I had always planned to use this software on this shot, and everything up until now has been paving the way for this. This is where I am able to balance the tonalities and bring the image into "daylight mode". Note that the increased saturation came naturally when the local area contrast was amped up; I actually had to dial DOWN the saturation in the software to compensate for too much gaudy color in the initial tone mapping.
This is, incidentally, one of the biggest pitfalls for those new to HDR and tone mapping; the tendency towards gaudy, cartoon-like colors.
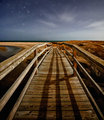
Looking at the tone mapped version, I see it is tending to bleed off, visually, at both top and bottom. So I set my gradient tool to a linear, foreground-to-transparent gradient, and I set foreground and background in my color picker to a dark blue and a dark brown.
I create a new, empty layer, and set the layer mode to "multiply", and check the option to "fill with multiply-neutral color (white)".
Now, with blue in the foreground on the color picker, I use the gradient tool to pull a blue gradient down from the top, then use "edit>fade gradient" to mute it until it looks right. Then I switch brown to the foreground, pull a brown gradient up from the bottom, and fade that one as well.
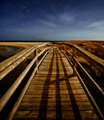
This is the final, planned enhancement of this image. I have always had in mind using the "Soft Black" feature of OnOne's Photo Tools 2.5 to create a palpable, gauzy depth to the dark areas of the image; this has been an integral part of my previsualization from the beginning. So that's what we have here. In the final stage, I'll add some serious sharpening on top of that, and we'll have what I'm looking for; an image that's both soft and sharp at the same time.
I have also used the OnOne "Golden Hour Enhancer" to boost the warm tones a little.
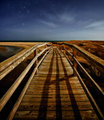
This is the final, sharpened image, as entered. It was sharpened with the Adamus Sharpening process:
1. reduce image to 1600 pixels
2. flatten image
3. dupe layer
4. filter>sharpen
5. dupe that layer
6. filter>sharpen
7. dupe THAT layer
8. filter>sharpen
9. reduce to 800 pixels
Finally, turn the layers on and off to find your best level of sharpening for the particular image. Often this will be with one of the layers at less-than-100% opacity. In this case, I tossed the third layer, ran the second one at 40%, and the first one at 100%
***********
Hope this is helpful to someone :-)
R. |
|
|
|
03/18/2011 04:45:00 PM · #2 |
| Oh Puppy Bear...as if we can ever imitate your magnificent work! ;-) |
|
|
|
03/18/2011 05:06:36 PM · #3 |
| Thank you for this! Do you save every stage of your image as you edit then? |
|
|
|
03/18/2011 05:16:41 PM · #4 |
Dang... I thought that photo was directly from "out of camera"!!!
...there is no Santa :( |
|
|
|
03/18/2011 05:23:47 PM · #5 |
| You should refer this to Langdon so he can post it in the "How'd They Do That?" section. |
|
|
|
03/18/2011 05:38:51 PM · #6 |
thanks for the tutorial Robert! Now that also partially explains the mystery I was wondering about in my comment to  hahn23's moonlit photo hahn23's moonlit photo

his exposure was 1900s and yours only 185 with roughly the same aperture and ISO. Yours was underexposed by what, 3 stops? It may not be the whole answer, probably you also had some lingering twilight... what time of day night did you shot this? |
|
|
|
03/18/2011 05:56:59 PM · #7 |
| oops, I just saw that you already answered this in the comment to that image. |
|
|
|
03/18/2011 05:59:17 PM · #8 |
Originally posted by Adz:
Thank you for this! Do you save every stage of your image as you edit then? |
They are all layers within a single image. I can deconstruct it at will. So to do one of these I just resize then entire image, layers and all, then make only the bottom one visible, save for web, open the next one, save for web, etc etc until I have all the key steps.
R. |
|
|
|
03/18/2011 06:01:18 PM · #9 |
Originally posted by FocusPoint:
Dang... I thought that photo was directly from "out of camera"!!!
...there is no Santa :( |
LOL! Shot in the pitch black night, to "look like daylight", you expect "straight from camera"? The ONLY virtue to SFC is to be able to say "This is how it really was!", and if you are making night look like day, obviously that's not how it really was, right?
R. |
|

|
|
Current Server Time: 12/02/2025 08:18:19 PM  |
Home -
Challenges -
Community -
League -
Photos -
Cameras -
Lenses -
Learn -
Help -
Terms of Use -
Privacy -
Top ^
DPChallenge, and website content and design, Copyright © 2001-2025 Challenging Technologies, LLC.
All digital photo copyrights belong to the photographers and may not be used without permission.
Current Server Time: 12/02/2025 08:18:19 PM EST.
|

