
| You are not logged in. (log in or register) | |
|
|
|
Tutorials :: "Acid" In Basic Editing
"Acid" In Basic Editing by MelethiaThe "acid" action (available from atncentral.com) is quite popular in the side challenges. It's a nifty tool that gives a particular almost cross-processed effect. But like many of the downloadable actions available, it uses steps that are not legal in basic editing. (In fact, I'd suggest that you very carefully look at all the steps used in a downloaded action before you consider it for basic editing!) The shot I wanted for flora was lacking in a) contrast, and b) color. The downloaded acid action brought out contrast and added a bit of color, but it used blending modes. So I set about trying to do it within basic editing rules.... Here�s the original for this example: 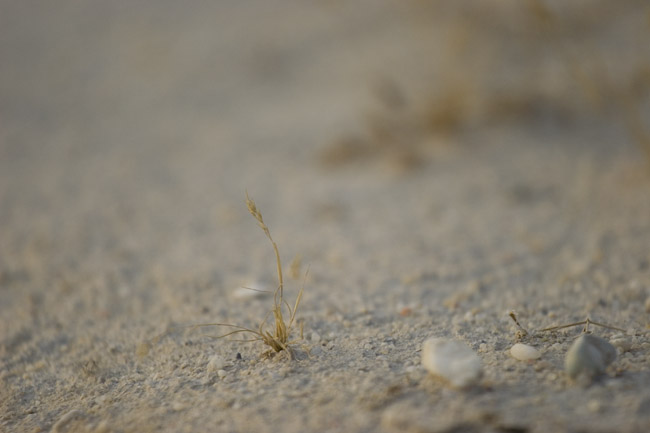
First step - adjustment layer for Levels (which is the first step in all my shots, usually - especially here where the histogram is very narrow due to lack of contrast). 
Second step - adjustment layer for Curves. I�ve copied and saved the �curves� set that is in the downloadable atncentral action. If you don�t have that, you can get it by running the action, then deleting everything except the curves layer. Alternately (and if you don�t have Photoshop) you can create the curve set yourself. I'd suggest after you do this, you save it so you can use it again. They look as follows (and note that the RGB curve, the black line, is an "S" curve to increase contrast): 


It was too strong for my taste, so I reduced the opacity of the Curves layer to about 65%. Note that ALL adjustment layers remain in Normal blending mode! Third step - an adjustment layer for Selective Color. I was trying to reproduce the effect from the downloaded action so I had that version up and played with the different colors to try to get close. You'll find that you get the most adjustment from the yellow, green, and neutral colors. Try adjusting the cyan, yellow, black and maybe magenta in those to see what works. This step is pretty dependent on your own tastes, and to some extent the photo you're working with. Fourth step - optional - it's something I like to try on a number of different shots and liked it on this one - an adjustment layer for B&W. I use the CS3 B&W adjustment layer, but you can use a hue/sat layer and desaturate, or any other basic method of converting to B&W. Then reduce the opacity of that layer a lot - to like 10-20%. It's very subtle and a matter of taste. Fifth step - optional - one more adjustment layer for Levels. I find as I do different things to the photograph, I often need to go back and readjust levels to keep a pleasing level of balance in lights and darks. Finally, if you want to tweak the colors a bit more (and it depends on taste and the photo), you can create one more adjustment layer for Color Balance and try "adding" a bit of color to taste. I think for the flora shot I entered, I added some red, green and blue. But again, try different things and see what you like. Finish by flattening everything, sharpening (or blurring!) to taste. Voila! 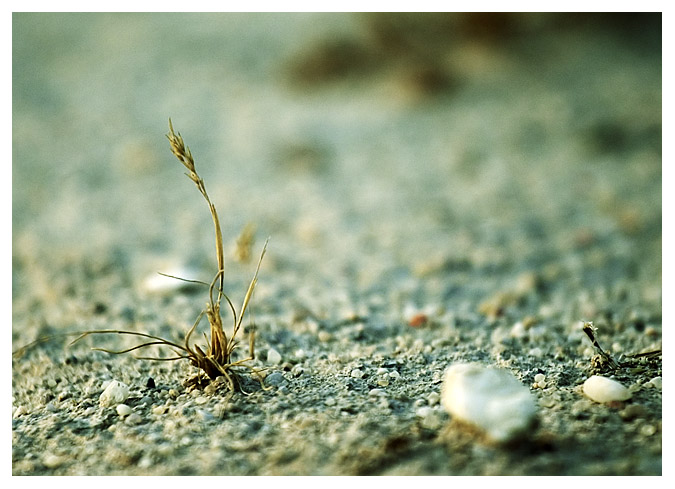
Home -
Challenges -
Community -
League -
Photos -
Cameras -
Lenses -
Learn -
Help -
Terms of Use -
Privacy -
Top ^
DPChallenge, and website content and design, Copyright © 2001-2026 Challenging Technologies, LLC. All digital photo copyrights belong to the photographers and may not be used without permission. Current Server Time: 07/09/2026 08:39:00 PM EDT. |