
| You are not logged in. (log in or register) | |
|
|
|
Tutorials :: Creating a Simple Watermark Action in Photoshop
Creating a Simple Watermark Action in Photoshop by Man_Called_HorseSince there are thieves out there on the WWW, a watermark is one way to keep your images your own. This technique is not my own. I picked it up in the PHOTOSHOP USER magazine. Step one= First you need to create a watermark. How you make a watermark can be as easy or as hard as you want it to be. The easiest way is to just simply open a new file in PS. Make sure the canvas is at least 7000x7000 ppi, with a 300 resolution with a white back ground. After opening, select whatever tool you want to use to make a watermark. I use the Ĺfontĺ or Ĺtypeĺ tool and simply type in black letters my watermark. After typing the watermark in black, go to the menu bar and select/ color range select the type. Add a new layer in the Layer palette and use the ôpaint bucketö tool to paint black whatever is selected from the color range. Now you have two (2) layers. One with your font and one with a selection of your font. Name the two layers appropriately. 
Step Two= Make sure the Ĺselected fontĺ layer is highlighted and on the top of the layer stack. On the bottom of the layer palette, click on the Layer Style icon (the little Ĺfĺ). Select ĹBevel and Embossĺ from the list. Make any adjustments you want here. 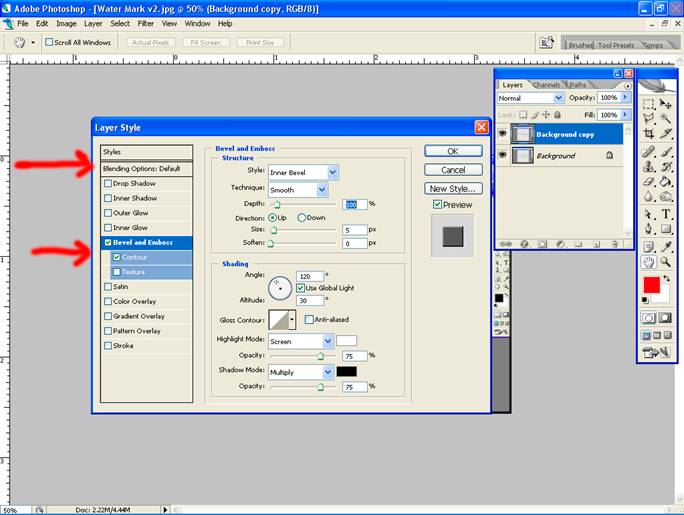
When ready, click the ĹBlending Optionsĺ settings on the upper left hand above the Style list. 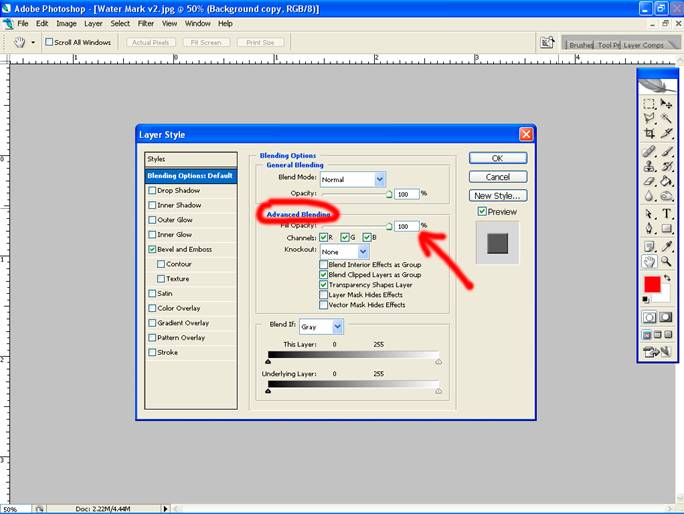
Drop the ĹFill Opacityĺ slider to 0% so as to only see the Bevel and Emboss, getting rid of the color and background. 
Now, simply select OK and close the dialog box. In the Layers palette, highlight the background Ĺfontĺ layer, which should be the bottom layer (not the layer that you just styled). Drag and drop into the garbage the background layer, leaving behind the stylized, beveled and embossed watermark layer in the layer pallet menu. Save As the watermark that you built in a .psd file. Saving in a .psd will make it possible to alter the look later if you want to. Step Three= This step is how you record an action to place watermarks on your photos. Open up a photo. 
Go to the Actions palette, next to the History palette, or simply go to the menu bar and click Windows/Action to open up the Action palette. 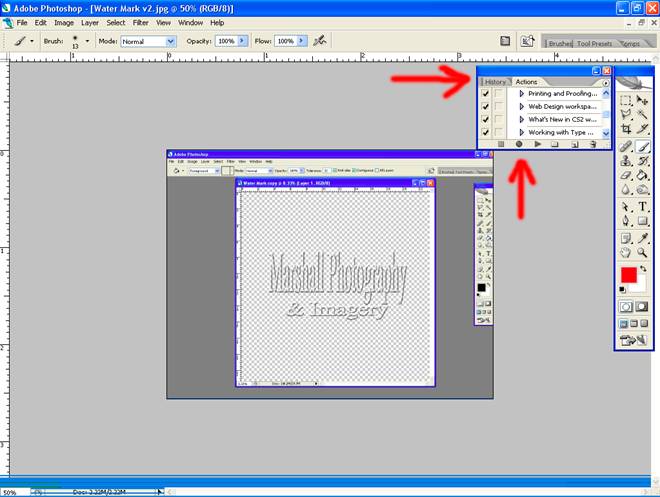
Describe the action, such as Watermarking Photos. On the bottom of the Actions palette are some buttons. Click the Record button. Step Four= Go to the menu bar. Click File/Place. 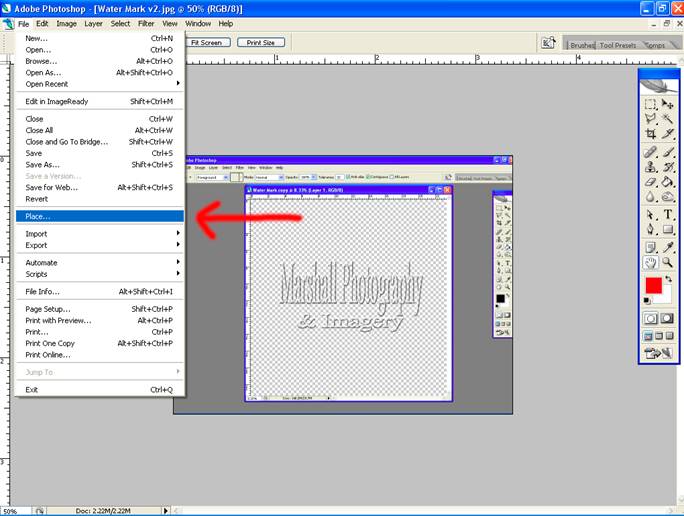
Locate your Watermark.psd file. When found, click "Place" on the lower right hand window. Adjust or move the watermark on the photo as needed. Step Five= Now, simply File/Save As, selecting a jpeg file format. Click on the empty square to the left of the Save step in the Action palette. This will turn on the Toggle Dialog ON and OFF, enabling the Save dialog to open each time you run the action. This way you can pick a different file name when the action runs. Step Six= Stop recording by clicking the square button on the bottom of the Actions palette. 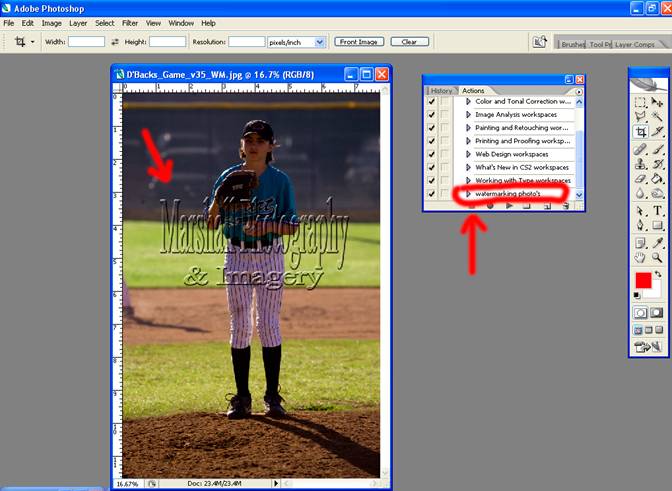
This technique will always place the watermark dead center and to scale every unless you make adjustments.
Home -
Challenges -
Community -
League -
Photos -
Cameras -
Lenses -
Learn -
Help -
Terms of Use -
Privacy -
Top ^
DPChallenge, and website content and design, Copyright © 2001-2026 Challenging Technologies, LLC. All digital photo copyrights belong to the photographers and may not be used without permission. Current Server Time: 06/23/2026 08:17:17 PM EDT. |