| You are not logged in. (log in or register) | |
|
|
|
Tutorials :: Tone Mapping Emulation
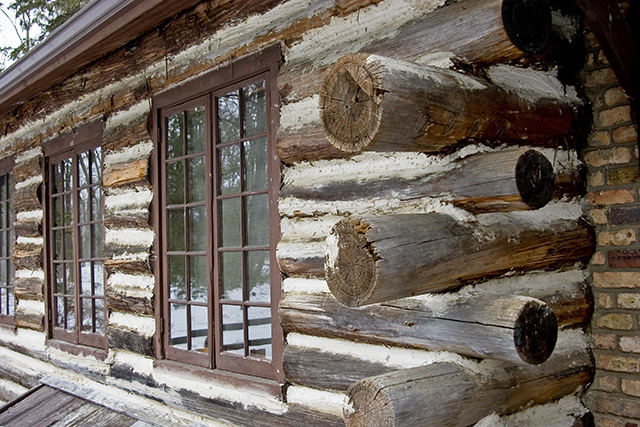
Tone Mapping Emulation by PhotologistIntroduction This tutorial explains the process used in applying tone mapping to single digital photographs using Adobe� Photoshop� CS2�s Local Adaptation feature. Generally, tone mapping is used in conjunction with a High Dynamic Range (HDR) process. The HDR process normally requires multiple exposures of an image. However, this tutorial requires only one exposure of an image to emulate true tone mapping. In some circles, this process is also known as �16-32-16 Tone Mapping�. Another benefit of using this technique is that it is legal under most of the post-processing rules of web-based photography contest sites such as DPChallenge (www.dpchallenge.com) It must be emphasized that this tutorial is not about creating HDR images in the traditional way; it is about bringing out as much tonal range as possible with a single image. Tone Mapping Tone Mapping, as used in this tutorial, is the process of manipulating a digital image so that a greater range of tonal detail is displayed. Tone mapping is used to approximate the appearance of high dynamic range images in media with a more limited dynamic range, such as print-outs, CRT or LCD monitors. Tone Mapping is carried out in a 32-bit image mode so as to allow Photoshop to take advantage of these extra bits to produce a relatively open-ended brightness scale, which can be fine-tuned to individual images. Example of Tone Mapping (before and after):
Assumptions There are some assumptions associated with this tutorial. Some of these assumptions include:
Software Requirements This tutorial was written based on Adobe Photoshop CS2. Other digital imaging editing software may provide similar features. Original Image Requirements Ideally, your original photograph should be converted from RAW to a 16-bit format such as TIFF. To convert to TIFF, open your RAW image in Adobe Camera RAW (ACR), or your other favorite RAW converter. Make any editing adjustments as necessary. Save your image as 16-bit TIFF using no compression. ("Save..." button > File Extension: .tif > Format: TIFF > Compression: None) Step-By-Step The best method to learn tone mapping is simply to �jump right in� and give you a step-by-step recipe. Convert from 16-bit to 32-bit
1. Open the previously saved 16-bit TIFF image in Photoshop 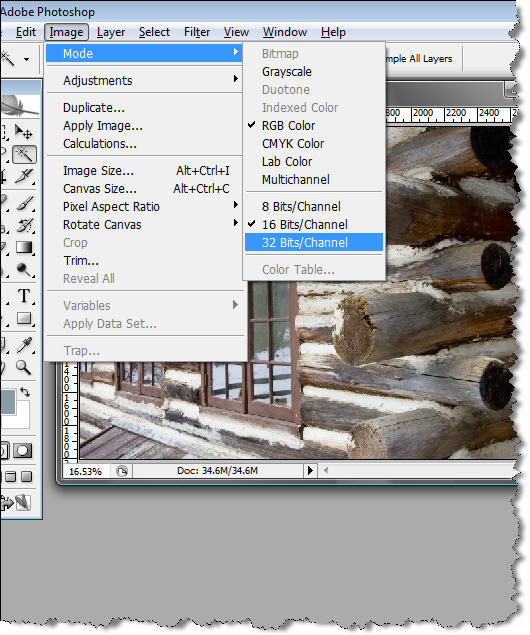 Convert from 32-bit to 16-bit 3. After doing nothing while in 32-bit mode, convert image to back to 16-bit (Image > Mode > 16 Bits/Channel) You will now be presented with the HDR Conversion tool. 4. Ensure that the �Preview� checkbox is checked. 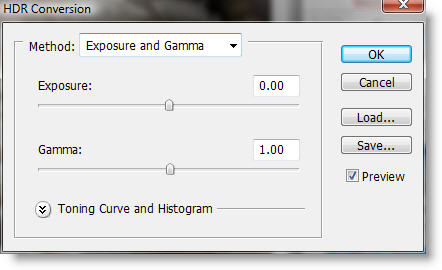 Local Adaptation 5. From the HDR Conversion tool dialog, click the double-arrows next to �Toning Curve and Histogram� 6. Choose �Local Adaptation� from the �Method� list box. Your image will most probably appear as being extremely bright and washed-out. 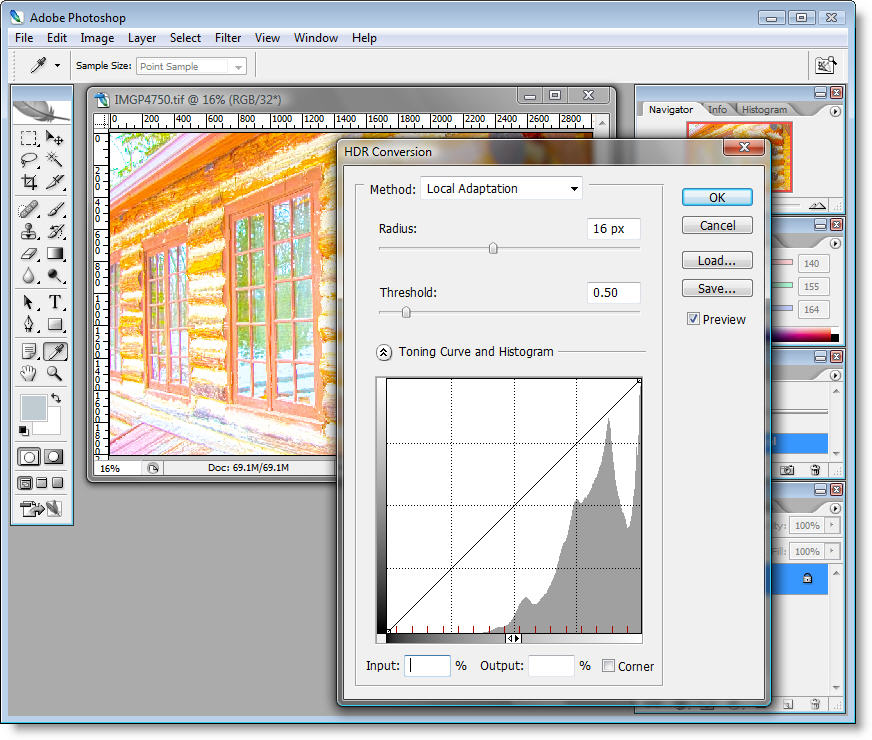 7. Begin adjusting the tonal curves--start by dragging the squares in the bottom-left and top-right of the histogram in toward the middle. I do not discuss the details on using curves because it is beyond the scope of this tutorial. However, I have offered a small tip below. 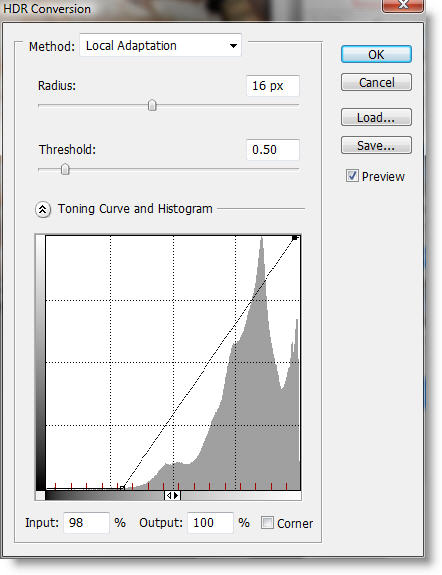 TIP: To aid in tonal curve adjustment, move your cursor to an area of an image and click-and-hold (drag) across that area. While dragging across the area, the cursor (pointer) turns into a pen icon. Also, while dragging, notice the small square on the tonal curve line that is moving in conjunction to your dragging. To adjust the tones and contrast in the area of the image where you were dragging, click on the curve in the position where the square appeared and adjust accordingly. 8. Adjust the radius and threshold, if necessary to achieve the desired look. Radius and threshold tweak the local contrast instead of small-scale sharpness. A high threshold increases local contrast but could also product halo effects. A radius that is too low can wash-out an image. 9. When satisfied with your curve edits, click the OK button. Photoshop now converts your 32-bit image back to a 16-bit image 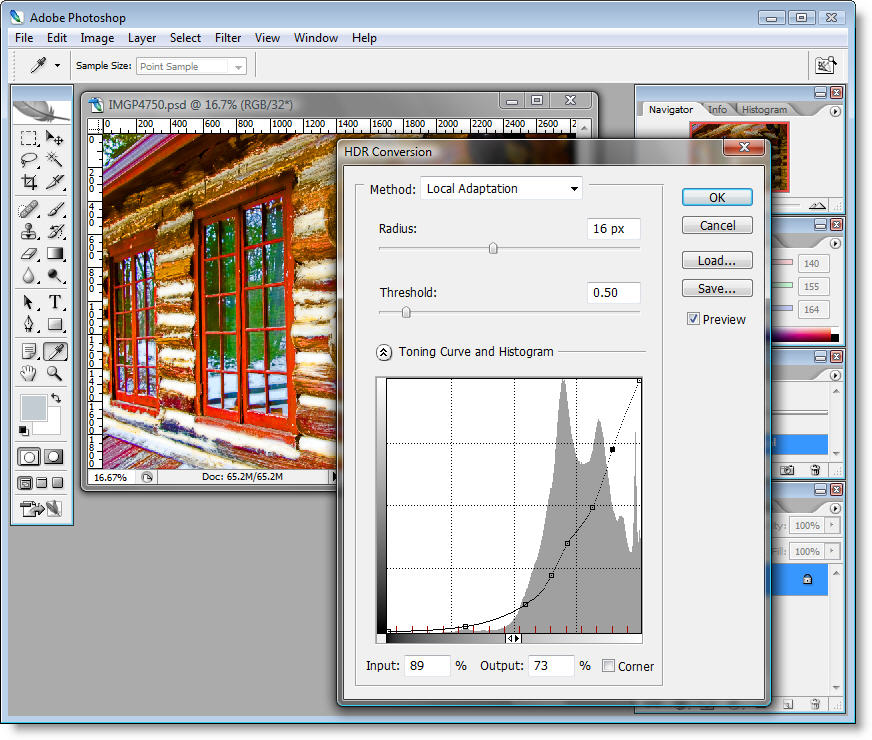 10. At this juncture, if you have not already done so, save your work as a PSD (Photoshop project) file. (File > Save As... > choose "Photoshop (*.PSD,*.PDD)" from the "Format" list box) Traditional Post-Processing 11. At this stage, you can further edit your image if necessary. Saving your image Save your image as a JPG for web display or for email in one of two ways: Option 1 (Save for Web): 12. Use the �Save for Web� JPG wizard (File > Save for Web�) Option 2 (Save as JPG): 13. Convert to 8-bit (Image > Mode > 8 Bits/Channel) 14. Save as JPG (File > Save as� > ) The Final Image: 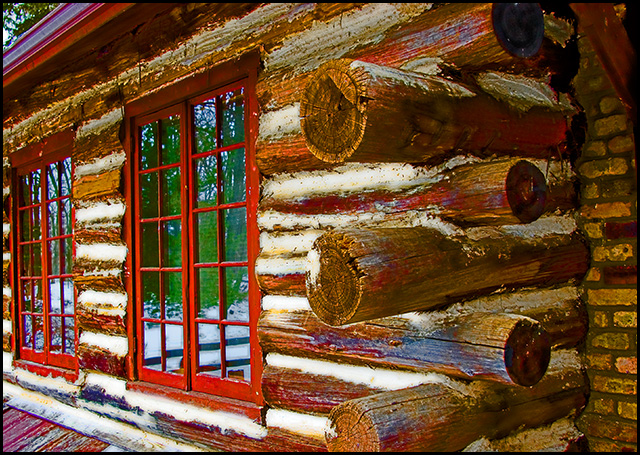
Summary While the procedures described in this document do not reflect true, authentic High Dynamic Range creation, it allows you to emulate HDR tone mapping with a single image. As stated earlier, this has the advantage of being within most of the editing regulations of a web-based photography contest sites such as DPChallenge (www.dpchallenge.com). Bibliography
Home -
Challenges -
Community -
League -
Photos -
Cameras -
Lenses -
Learn -
Help -
Terms of Use -
Privacy -
Top ^
DPChallenge, and website content and design, Copyright © 2001-2026 Challenging Technologies, LLC. All digital photo copyrights belong to the photographers and may not be used without permission. Current Server Time: 07/14/2026 03:53:13 PM EDT. |