
| You are not logged in. (log in or register) | |
|
|
|
Tutorials :: Layer Masks
Layer Masks by GeneralEThis is an image of the eastern span of the Bay Bridge currently under construction. Naturally, for a brightly-sunlit day I set the WB to Tungsten, so now I need to get "arty" to see if there's a possibility of rescuing it, but it provides a fairly good model upon which to demonstrate. 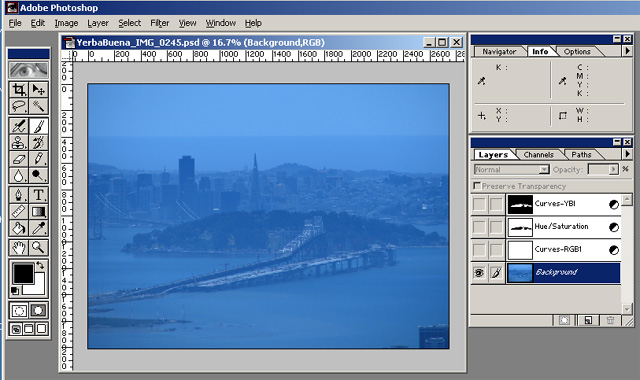
RGB Curve Adjustmnent Layer for contrast. Note the white rectangle in the Layers Pallette indicates the curve applies uniformly to the entire image. 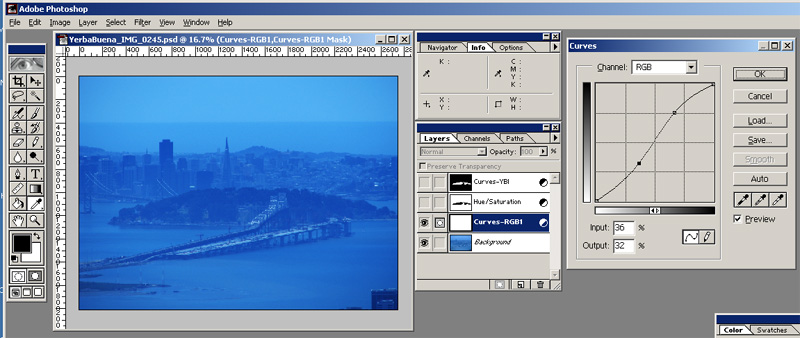
Hue/Sat Adjustment layer to change the color. I'm lousy at this, so I just did it enough to make a discernable, though not necessarily desirable, change. 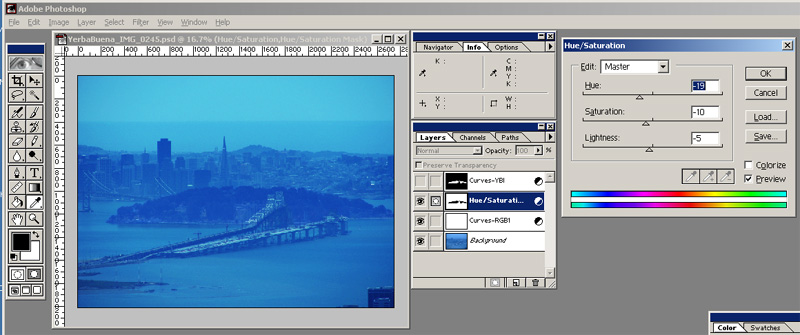
Unfortunately, to make this, I had to have the masks layers already made, so you can (maybe) see that the effect is not applied to Yerba Buena Island. See the shape in the Hue/Sat layer thumbnail? With the Hue/Sat Adjustment Layer selected in the Layers Pallette, you can go to the Channels Pallette, and select the channel for the Layer Mask. This layer is a separate 8-bit grayscale channel, meaning you can use and painting/drawing tools to fill or erase pixels. Gray pixels will represent partially-selected areas. You have a choice as to whether the part you paint black is the area affected by the adjustment (selected) or protected from the effect (masked), and what color/transparency represents the channel when other channels are visible -- in this case, a 50% yellow color makes the mask contrast nicely with the blue BG. Note that this is a crudely-drawn mask -- if I really try and fix this, the mask will have to be carefully drawn to go between all the bridge girders and better follow the treeline. 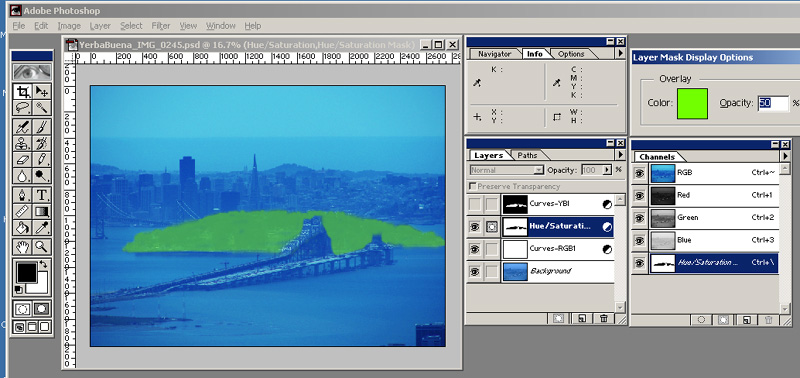
Note that the name of the Layer Mask is in italics in the Channels Pallette. This means it only exists as an editable channel when the Adjustment Layer is the active channel. If you make the Background layer active, the Layer Mask disappears from the Channels list (more on this later). 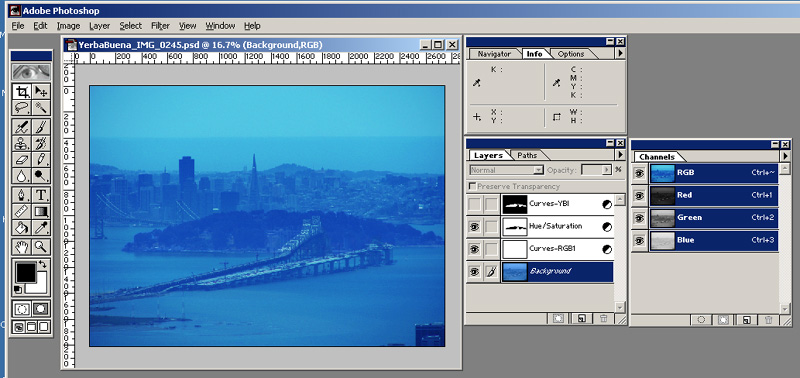
A Layer Mask, an Alpha Channel, and a selection which has been saved (menu Select > Save Selection ...) are all essentially the same thing; a selection which can be re-loaded or modified at any time for repeated or adapted use. Taking advantage of this, I made the Hue/Sat Adjustment Layer active and went to the menu Select > Load Selection ... and chose "Hue/Sat Transparency" from the pop-up list in the dialog box, as well as selecting off the Invert checkbox. This gave me a selection (marching ants) opposite of the original Hue/Sat area. When I then select New Adjustment Layer > Curves from the Layers Pallette, the selection becomes the Layer Mask for the effect automatically. I applied a Curve to the Blue Channel to try to return the Island foliage to a somewhat normal color, while leaving the rest of the photo blue. 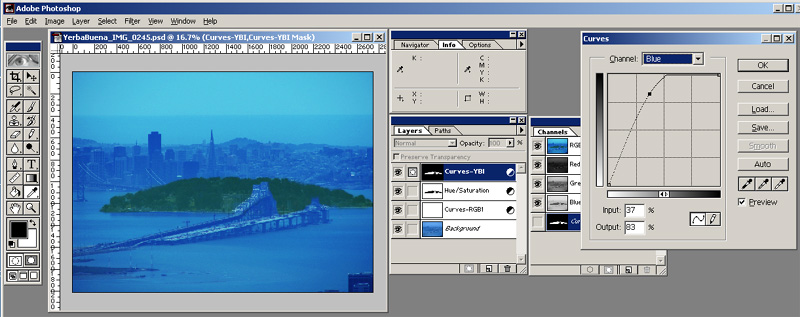
Just to show how a "regular" mask is made, I now went to the Channels Pallette and selected New Channel, naming it for the Bank of America monolith near the center of the photo. Notice that the Curves Layer is still active, so its Layer Mask appears in the list of Channels, but its name is in italics, meaning it will "go away" once another layer is activated. By contrast, the BofA layer is in "regular" type, meaning it will remain as an editable channel no matter what layer is active (see next two images). Note that to make it easier to see where to mask I made only the Green Channel of the image visible, and in this case I chose a red color to represent the mask and that the painted area represents the selected area. 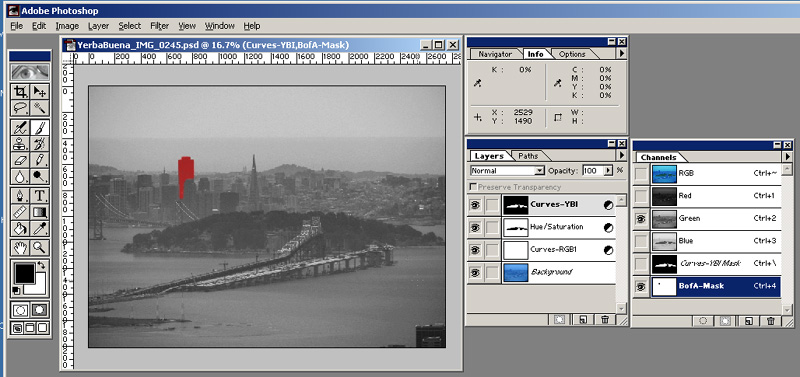 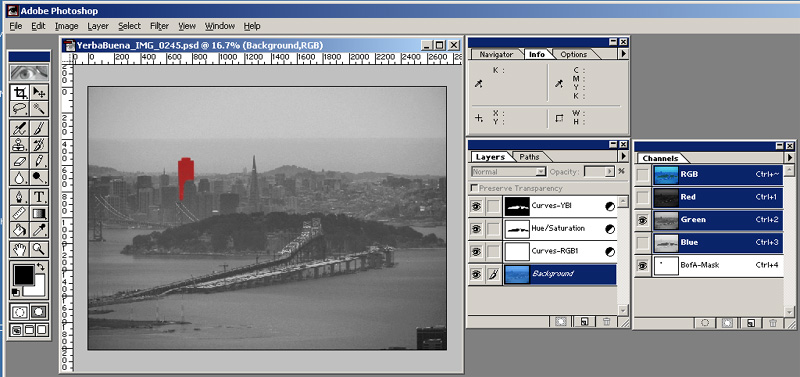
Back in the Layers Pallette, I used the menu Select > Load Selection ... and chose the BofA Mask from the pop-up list. Then in the Layers Pallete I chose New Adjustment Layer > Curves and the active selection automatically became the Layer Mask for the Curves effect. A crude but obvious adjustment makes the building closer to the black monolith it really is. Notice that in the Channels Pallette, both the BofA mask and the newly-created Curves Layer Mask exist, and the Layer Mask is the inverse in whether the color represents selected or masked -- I can only speculate on why they allow this inconsistency, and can't take the time now. 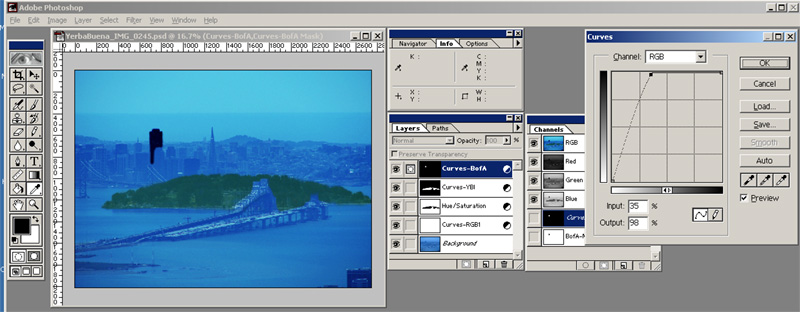
Once the last change is made and the BG Layer selected, all the Layer Masks disappear from the Channels Pallete (but remain available as long as the layer exists). The Alpha Channel can be kept or discarded (there's a "copy" in the Curves Layer!). 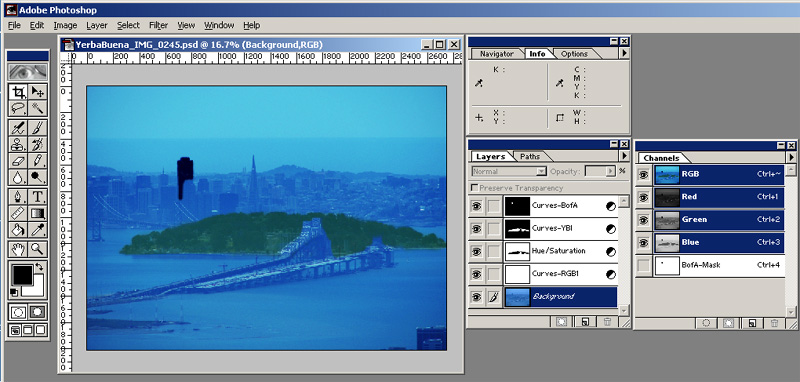
Home -
Challenges -
Community -
League -
Photos -
Cameras -
Lenses -
Learn -
Help -
Terms of Use -
Privacy -
Top ^
DPChallenge, and website content and design, Copyright © 2001-2026 Challenging Technologies, LLC. All digital photo copyrights belong to the photographers and may not be used without permission. Current Server Time: 07/08/2026 10:29:36 AM EDT. |