| You are not logged in. (log in or register) | |
|
|
|
How'd They Do That? :: 2010: "All These Worlds Are Yours ..."
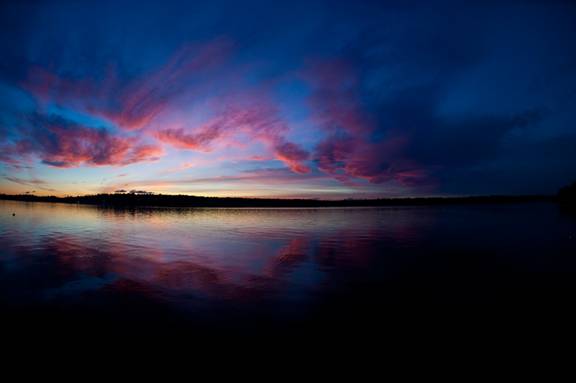
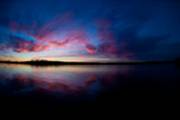
2010: "All These Worlds Are Yours ..." by Dr.ConfuserEveryone loves sunsets, and sunsets over water are among some of the most spectacular there are. But when I try to shoot sunsets, I'm often disappointed. How do I get better sunset pictures? Below are 4 techniques I use to get increasingly better sunset pictures … maybe they'll work for you. Technique 1 Okay, this is the one that works least well for me but it does sometimes work. Set your camera with a combination of ISO and aperture to shoot the sunset with a shutter speed of at least 1/100 second. Faster is better until noise begins to detract. Set EV Compensation to -2/3 stops (you may want to experiment.) For a single hand held shot, this gives me the best results. See an example below.
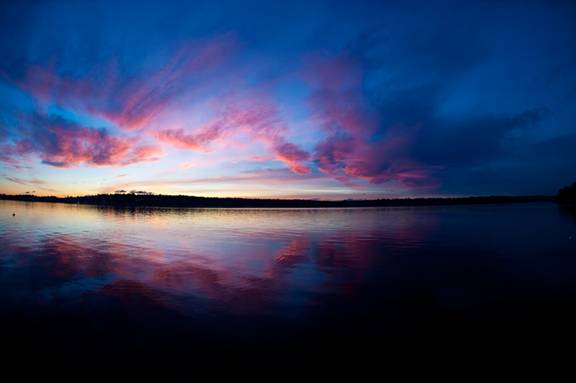
Okay, not too bad. Colors are okay. I've got some reflections I like and some nice cloud detail. Maybe brighten it a bit and you've got a nice sunset. Technique 2 The display on the back of my camera isn't that accurate. So to buy some insurance, I bracket the shot. I set my camera to take 7 photos, 2/3 of an f/stop apart. This gives me a range of -2 to +2 f/stops to choose from. Now when I get to my computer, I can simply pick the one that I like the best. Here's what I'd get. 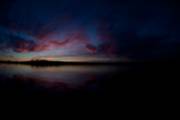
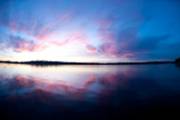
I like the sky best in the third one, and the water best in the fifth one. So, perhaps the best one, on balance, would be the fourth one.
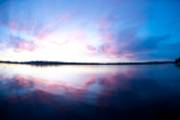
I like this one better. The sky is a bit better, but I wish I could see a bit more of the water reflections. I am sure I could work it over with an Overlay dodge and burn layer and improve it further, but I find I get better results from HDR. Technique 3 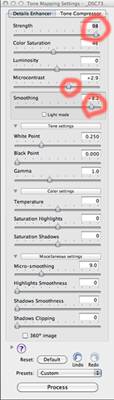 I first set my camera on
a tripod, set the ISO as low as I dare, set the aperture at the sweet spot of
the lens. And I bracket exactly as in Technique 2. Then using Photomatix, I
create an HDR composite and tone map it. I want to choose tone mapping settings
that will give me a realistic result, rather than a cartoonish result. Here's
what I get. I first set my camera on
a tripod, set the ISO as low as I dare, set the aperture at the sweet spot of
the lens. And I bracket exactly as in Technique 2. Then using Photomatix, I
create an HDR composite and tone map it. I want to choose tone mapping settings
that will give me a realistic result, rather than a cartoonish result. Here's
what I get.
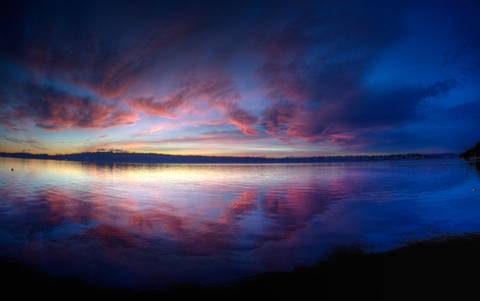
This is better. I've got more water reflections and my sky is better defined. Fewer blown blacks. No blown whites. I am sure you'd play with the tone mapping settings and get different results, ones that might please you more. But we're headed in the right direction. Open this in Photoshop and work it over to your heart's content. Technique 4 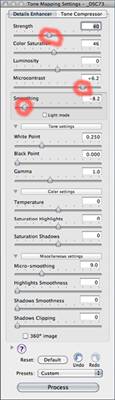 Welcome to the Big
League. In this approach I'm going to composite to HDR and tone map the image
twice – then blend them together. So to start, I process the images as in
Technique 3. Then separately, I composite to HDR and tone map – differently –
more to the cartoonish end of the spectrum. This will give me more of the
reflection detail I want. So when I've done that, here's what I have – but we
won't stop here. Welcome to the Big
League. In this approach I'm going to composite to HDR and tone map the image
twice – then blend them together. So to start, I process the images as in
Technique 3. Then separately, I composite to HDR and tone map – differently –
more to the cartoonish end of the spectrum. This will give me more of the
reflection detail I want. So when I've done that, here's what I have – but we
won't stop here.
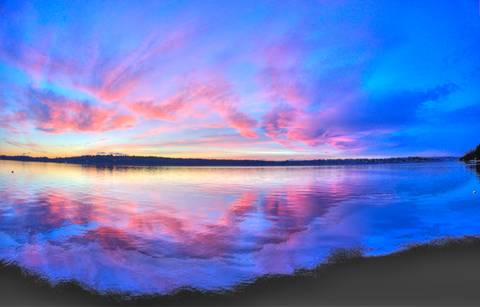
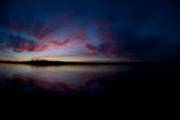
Now I really don't like this much, but look at how the cartoonish version has brought out the reflections.
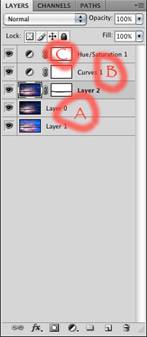
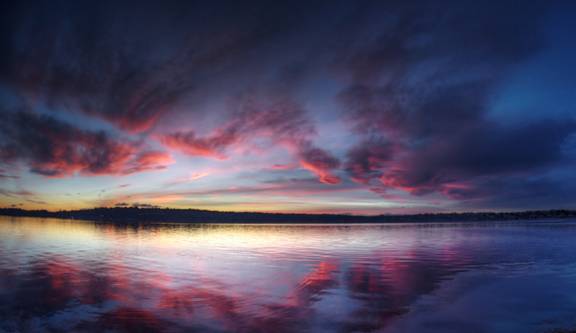
Now, in Photoshop, open both this and the Technique 3 photos. Using the move tool, drag one image over the other stacking it above the other image. You can see the Technique 3 and Technique 4 images as the bottom two layers. Here's whether the magic happens. Select the bottom two layers. Then go to the Photoshop menu and choose Edit>Auto Blend Layers. Wow! To finish it off, I made a composite of the bottom two layers (CMD-Option-Shift-E) and blurred it a bit masking the horizon line. Then I boosted the contrast with a Curves layer (B) and monkeyed with Saturation in a Hue/Sat layer (C). In the Hue/Sat layer, I slightly desaturated the Blues and Cyans. And I boosted the saturation of the yellows and reds slightly. When I was all done, I had an image with sky treatment that gave good definition and depth to the clouds. I had water treatment that showed me pleasing reflections. I then cropped the image to improve the composition slightly. Resize, and save-for-web and you've got a challenge entry like this!
Home -
Challenges -
Community -
League -
Photos -
Cameras -
Lenses -
Learn -
Help -
Terms of Use -
Privacy -
Top ^
DPChallenge, and website content and design, Copyright © 2001-2026 Challenging Technologies, LLC. All digital photo copyrights belong to the photographers and may not be used without permission. Current Server Time: 06/16/2026 09:11:36 AM EDT. |