
| You are not logged in. (log in or register) | |
|
|
|
How'd They Do That? :: Blown Away
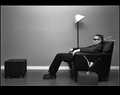
Blown Away by DrAchoo The original poster, a well known add for Maxell tapes, was shot by Steve Steigman in 1978. You can see a nice online copy of it here. The first thing I had to do was find the biggest blank wall possible. Second, was to find a chair of similar type. Both could be found at a friend’s who was gracious enough to let me screw around in his family room. It looks like the chair in the original had the cushion removed so the “Blown Away Man” (as he’s called) has a very low profile. Unfortunately the cushion was sewn into this chair so I couldn’t do that. A few test shots were done for lighting etc. I had built a little box out of posterboard covering a small cardboard box. It’s easily the worst part of the picture as you can see the box sticking out. I had meant to shoot the shot very much lower, but in the rush of trying to do this at a friend’s house and not take up two hours, I just shot at the normal height of my tripod with the legs not extended. I wish I had shot it at about 12 inches off the ground. The tricks of the wind effect were fairly easy. The lamp shade was just placed on a tall indirect lampstand and taped into place. You can see it from behind below. The cord is made of taut electrical wire wire a bead borrowed from my daughter taped on the end. 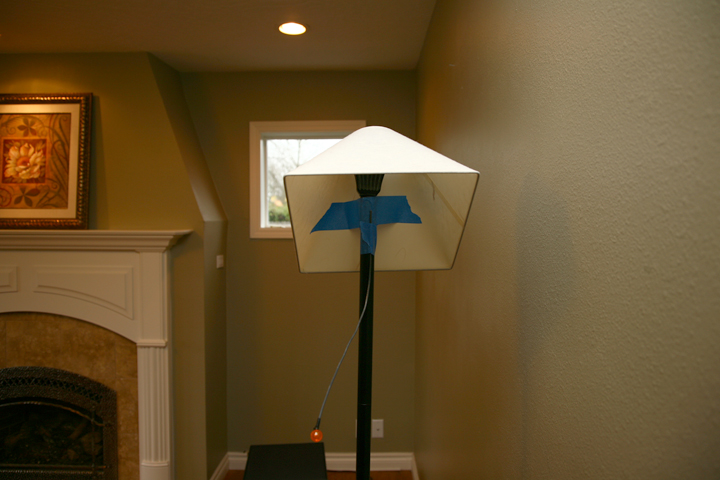
The tie is likewise held in place with a large electrical wire. I am not, in fact, wearing it, but rather it is taped in place to the chair. I simply sat so it looked like it was coming out the back of my neck. 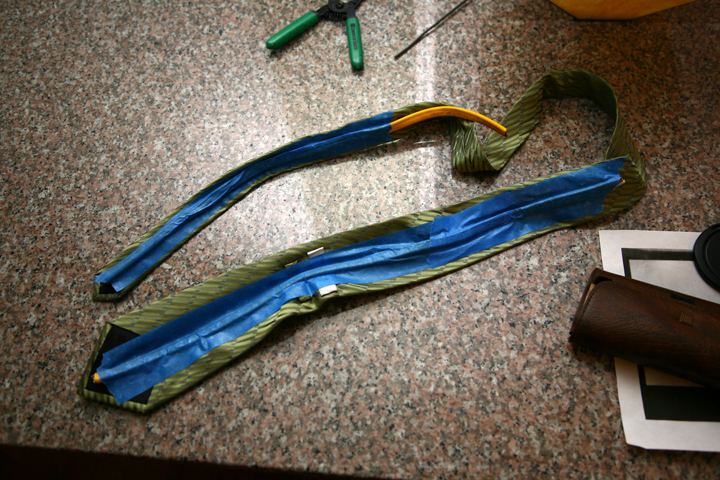
The martini glass was the hardest. I thought of trying real liquid, but quickly decided that would be nearly impossible, especially with basic editing. scarbrd came up with the idea of using wax. I built a little form out of waxpaper and then proceeded to melt wax in the best “splash” shape I could muster. It didn’t look bad, but wound up breaking twice on me. Finally, 20 minutes before the photoshoot, I reinforced it with two toothpicks. It looks very white in the picture which is good because it shows up nicely against the dark chair, but bad because it looks like a martini made from milk. Oh well. The three little drops heading in the other direction were wax spots taped onto the chair. 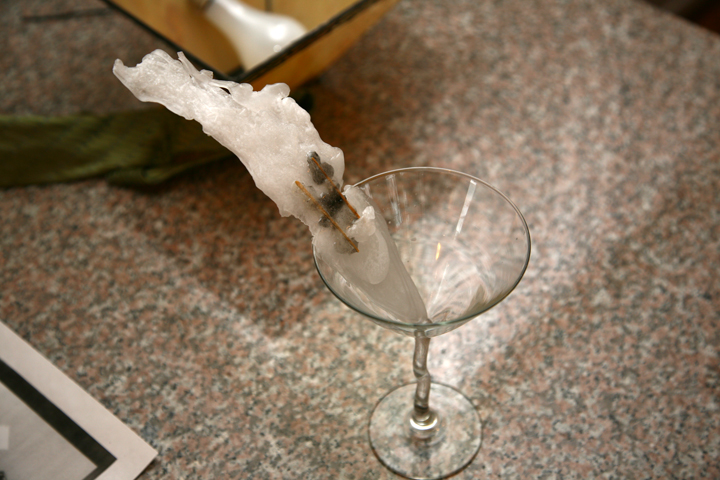
The glass is placed on its end and supported with a pieced of wax sculpted into a wedge. I couldn’t quite get it to be invisible and wish it could have been cloned out.
Home -
Challenges -
Community -
League -
Photos -
Cameras -
Lenses -
Learn -
Help -
Terms of Use -
Privacy -
Top ^
DPChallenge, and website content and design, Copyright © 2001-2026 Challenging Technologies, LLC. All digital photo copyrights belong to the photographers and may not be used without permission. Current Server Time: 06/16/2026 09:11:36 AM EDT. |
 Blown Away