USM = UnSharp Mask filter. The "high-radius" setting is used to help bring out contrast, similar to the "clarify" filter in another program (I'm using an old version of Photoshop). The "regular" setting is to heighten edge detail.
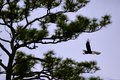
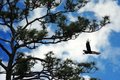
I made a (sloppy) mask for the eagle, then applied an RGB curve and one on the Blue channel to just the eagle, and then applied separate curves to the background while masking out the eagle. If I was doing this "for real" I would probably spend anywhere from 10-45 minutes making a more precise mask.
You should be able to come close using these set-points for the curves adjustment layers (note thumnails of the masks in the Layers palette):
For the eagle:
-RGB: 42=0, 79=64
-Blue: 7=0
For the BG:
-RGB: 200
-Blue: 14=0, 41=29, 83=100
Here are some screen shots ... if you look in the Info Window, you can see the Before/After color values for the pixel(s) under the cursor when the screenshot was taken, approximately in the small circle.
Curves, especially used in adjustment layers with masks, are an extremely powerful way to control tone and color; I rarely use anything else.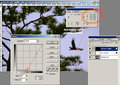 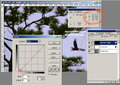 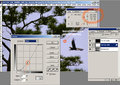
PS: Note that I have the gradients in the Curves graph the opposite of the Photoshop default, with 0,0 in the lower-left and the 100% values at the top and right. You can apply many set-points to a curve to finely control tonal gradations. The general rule is the steeper the slope of the curve the more detail; a flatter slope will merge tones into areas of flatter color. The "standard" adjustment to try first (especially for landscapes) is an "S"-curve: make the highlights lighter and the shadows darker and increase the slope (detail) through the midtones.
Message edited by author 2011-05-12 01:20:12. |