
| You are not logged in. (log in or register) | |
|
|
Tutorials :: Homemade Lightbox
Homemade Lightbox by rob_smithI needed a lightbox for my recent challenge entry and had a look on the interweb for a guide to make one. There are a few good ones out there, but I needed something I could build in an hour to shoot for the Skin challenge that was a couple of hours away from closing. The Strobist's article was a pretty good guide so I thought I'd build one and document the process. You can judge the results for yourself. Stage 1: Materials Needed I had some big sturdy boxes left over from moving house so I used one of those, it's the double thickness kind, pretty handy as you'll be removing a lot of the cardboard so you need some strength left in the frame. Some large sheets of tracing paper, mine were 14" x 17", pretty cheap from any art shop. A sheet or two of Bristol Board or thick white paper for your seamless background. And a knife and stickytape. I have a little toy car in the shots for scale. 
Stage 2: The Build I outlined around my tracing pad to mark how big the sheets were, and then cut using a craft knife about 1cm inside the line I had traced. You cut three holes in the sides ofthe box and leave the one side as the base. The image below shows the first bit of tracing paper held in place with duct tape before I properly stuck it down with sellotape. 
Stage 3: Inside This is how the box looks on the inside once you have taped all the sheets on. If you want to you can remove the base so that you can place the box over an object. If you are using just one light then the other sheets can also add a little fill. 
Stage 4: Backdrop I just taped the bristol board into place, mine was a pretty long box so I stuck another sheet in there to cover the floor. Both sheets needed trimming to the width of the box. Don't get caught up on getting bristol board specifically, pretty much any white paper will do. I also have darker sheets for more low key shots. 
Stage 5: Light Position OK don't laugh. So using what I had around me to position the lights (2 x SB-800's) I had one pointing directly down and another for fill camera right. For the exact specs it's a trampoline, a disney toy box and a piano! I did have another light stand but just couldn't be bothered setting it up, the toys were just the right height. 
Stage 6: Test Fire Here's what it looks like when the strobes fire, FYI I am using an SU-800 to control the strobes. Nice even light all around, and my little blue Mitsubishi EVO in the box. I have dialled down the light on the right by one stop. 
Stage 7: Test shot So here is a shot of the car, I was zoomed in quite far with f/5.6 which accounts for the short DOF. Also when taking shots against a white background use spot metering instead of matrix, or your camera will adjust the exposure down to get more of a grey background. The lighting is exactly what I was after, clear and no harsh reflections. The box is large enough to be able to angle things in many ways to get just the reflections you want, and the background is seamless. 
Stage 8: The Challenge For the Skin Challenge I wanted to shoot my new skin for my phone, probably a bad choice for the DPC crowd as it's tanking at the moment, oh well ha ha. Again using David Hobby as my inspiration I thought a little blue hue to the lighting would give it a bit of a techie feel. So I put a sheet of blue cellophane over the top window of the box. Funnily enough I didn't have this lightbox built for the Light on White challenge, wish I had! 
Stage 9: The Final Shot So this was the first proper shot using the light box, and apart from the short DOF (f/11) which I should have corrected, and a tiny bit of fluff on the screen (which I couldn't clone out) I really like it. It has just enough blue for what I wanted and neither the white skin nor the background are blown out. I adjusted the levels slightly, added a tiny amount of contrast using curves and then resized and sharpened. 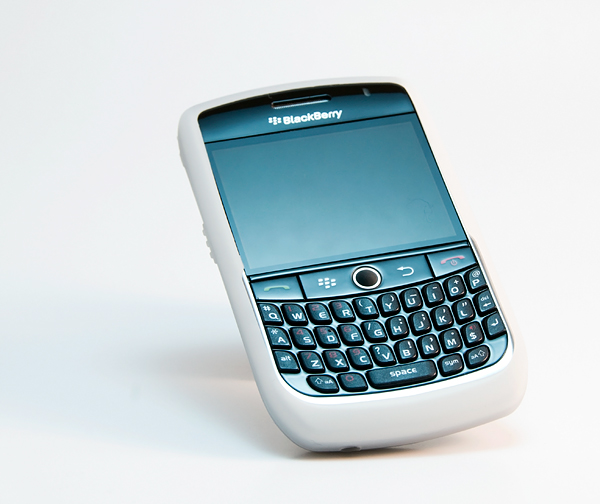
Overall it took about an hour to build and less to shoot and edit the image, I am very pleased with the box so will definitely be using it again. Hope you enjoyed the tutorial, if you have any questions post them up and I will reply. Rob
Home -
Challenges -
Community -
League -
Photos -
Cameras -
Lenses -
Learn -
Help -
Terms of Use -
Privacy -
Top ^
DPChallenge, and website content and design, Copyright © 2001-2026 Challenging Technologies, LLC. All digital photo copyrights belong to the photographers and may not be used without permission. Current Server Time: 01/07/2026 01:41:50 AM EST. |