| Author | Thread |
|
|
06/22/2006 09:15:20 PM · #1 |
Okay..now I don't use Elements as a rule but to help the members that do use Elements, here is 'A How To' on Borders and Text. So please follow along...I have tried to make it as simple as I can. This tutorial can also be changed easily for other programmes.
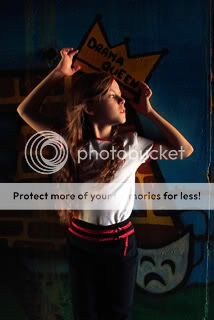
1 -Open your image. For this tutorial I had to switch over to my old computer as I don't have Elements on this computer. So I had to use one of Kita's images for the samples.
___________________________________________________________________________
2 -Now we need to do any resizes first. So go to Image/Resize/Image Size.
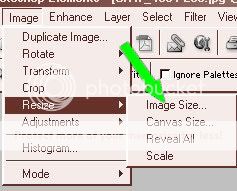
Change your image size to what you want.
___________________________________________________________________________
ADDING BORDERS
3 -Now we are going to add two borders. So hit D on your keyboard to make your foreground/background colours the default...which is black for the foreground and white for the background. The next step will be determined by the colour of the background. We are going to make our first border white so the current setting is correct.

___________________________________________________________________________
4 -Go to Image/Resize/Canvas Size. Click on the drop down windows and choose pixels (or whatever you prefer to use).
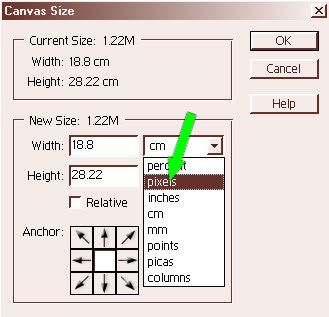
In this tutorial we are going to add a 2 pixel border. Now there are two horizontal sides and two vertical sides, so instead of increasing the image dimensions by 2...you need to increase it by twice that. So increase both the width and the height dimensions by 4. (Eg...246 pixels needs to be highlighted and changed to 250).
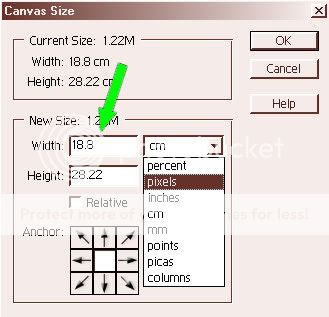
Make sure the center anchor is pressed to keep the image even.
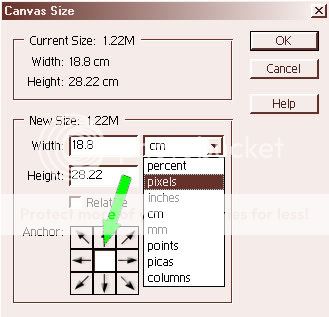
Click OK.
___________________________________________________________________________
5 -Click on the arrow on your foreground/background colours to switch them making black the background colour and white the foreground colour.

___________________________________________________________________________
6 - Now we are going to add a 30 pixel black border. So repeat step '4' but change the 4 to 60.
___________________________________________________________________________
ADDING TEXT
6 -We are now going to add some text so we need to add a new layer. So turn on your layer palette by either of the following methods.
Window/Layers
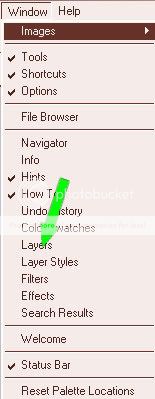
or
Clicking on the top right of the window where it says Layers.
You should now see your layer palette.
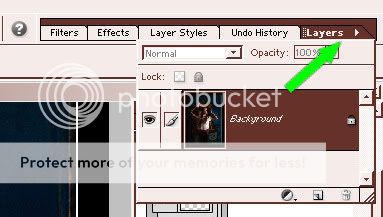
Click on the new layer icon as per the below image.
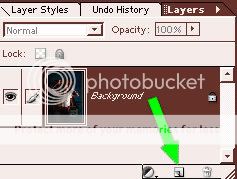
You should now see two layers on your palette. Your background layer with your image and a second layer where we are going to put your text.
__________________________________________________________________________
7 -Click on the Text tool.

Click on your image where you want your text and you will notice a flashing cursor on your image.
You will see a bar at the top of the window with your options. Change your font/size and justify to either left, center or right as per the image below. Also you will notice a white square in the image below. This is the chosen colour of your text. If you want to change it, simply click on the square and choose your preferred colour.

Now type your text like in this image.
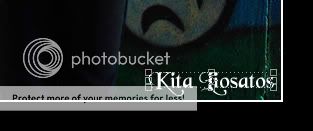
Don't worry too much about the placement of the text. Click on the tick.

___________________________________________________________________________
8 -Click on your mover tool.

Because your text layer is the active layer you can now move the text to where you want it to be. You can even resize the text if you want.
___________________________________________________________________________
9 -Sometimes your text might be a bit overpowering for the image. So we need to reduce the opacity by clicking on the opacity bar as per the image below.
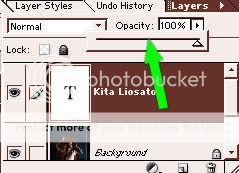
Slide the triangle down to where you want it...have a play and you will know what looks good.
___________________________________________________________________________
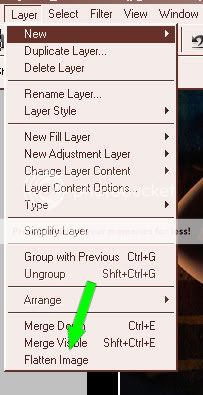
10 -Now we need to flatten the image by going to Layers/Flatten Image.
___________________________________________________________________________
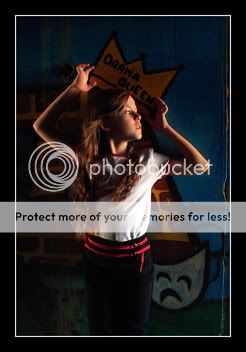
11 -Save your image your preferred way. Here is the finished image.
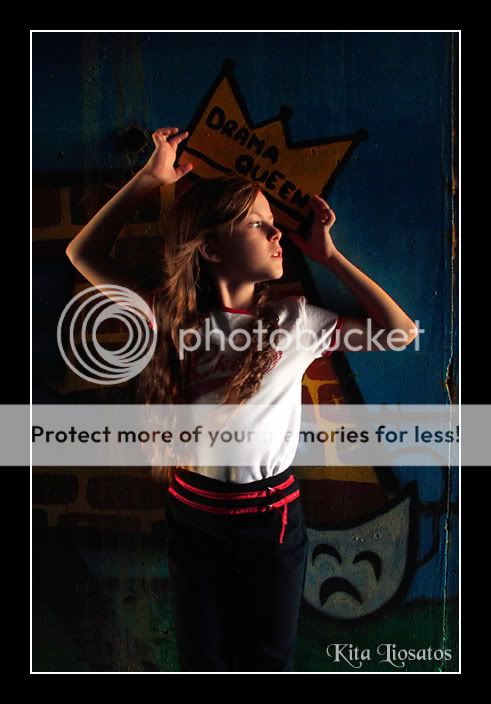
I hope you enjoyed this tutorial and had no trouble understanding it. You should be able to convert this to use in any programme.
|
|
|
|
06/22/2006 09:17:11 PM · #2 |
| Great tutorial Judi. I would ask Langdon to add this to the tutorials ;) |
|
|
|
06/22/2006 09:18:28 PM · #3 |
Thanks Rikki...I will send an email now.
|
|
|
|
06/22/2006 10:01:12 PM · #4 |
Thanks Judi
I can't wait to go try it out! |
|
|
|
06/22/2006 11:47:58 PM · #5 |
Great tutorial Judi!
If you go with layers and add masks, you can end up with something like this: where you put the frame behind the subject of the photo. This of course cannot be done in basic editing as it requires masking... where you put the frame behind the subject of the photo. This of course cannot be done in basic editing as it requires masking... |
|
|
|
06/23/2006 09:04:43 AM · #6 |
Thanks Serge. I like your image too.
|
|
|
|
06/24/2006 01:58:33 PM · #7 |
| This tutorial has been added as a Site Tutorial. Thanks, Judi. |
|
|
|
06/24/2006 02:44:38 PM · #8 |
Great tutorial, Judi. Two comments: your illustrations for changing canvas size should show "pixel dimensions" to be consistent; they currently show cm but you are specifying pixels. Also, for what it is worth, you don't need to create a new layer before adding text; if you select the text tool and start typing, it automatically creates then new text layer and names it with the actual text you have used, with is handy. In other words, if I took your image and just clicked anywhere and typed "Judi Rocks!", this would create a new layer in my layers palette with the name "Judi Rocks", and I can then drag the text on that layer anywhere I want to, just as you have described.
Robt.
|
|
|
|
06/24/2006 02:48:21 PM · #9 |
| This thread is now the official tutorial comment thread. |
|
Home -
Challenges -
Community -
League -
Photos -
Cameras -
Lenses -
Learn -
Prints! -
Help -
Terms of Use -
Privacy -
Top ^
DPChallenge, and website content and design, Copyright © 2001-2024 Challenging Technologies, LLC.
All digital photo copyrights belong to the photographers and may not be used without permission.
Current Server Time: 04/19/2024 01:05:49 PM EDT.


