| Author | Thread |
|
|
05/02/2011 08:09:07 AM · #101 |
another lesson:

When I was cloning onto a new layer, I used the eraser tool to erase the parts the areas where I cloned too much. Sometimes I erased too much, and then had to undo and try again. I had the brilliant plan of masking out the areas that were the overflow. That way if I masked out too much, I could just go back and change the brush color to white to fix it.
Brilliant!!
Except when I moved the ball, the mask didn't move with it. Not so brilliant of an idea. :( |
|
|
|
05/02/2011 08:24:42 AM · #102 |
Originally posted by vawendy:
another lesson:
When I was cloning onto a new layer, I used the eraser tool to erase the parts the areas where I cloned too much. Sometimes I erased too much, and then had to undo and try again. I had the brilliant plan of masking out the areas that were the overflow. That way if I masked out too much, I could just go back and change the brush color to white to fix it.
Brilliant!!
Except when I moved the ball, the mask didn't move with it. Not so brilliant of an idea. :( |
Yayyyy...that is what I have said a couple of times in this thread....mask the edges of your ball for a better result. And the reason the mask doesn't move is because you have unlocked the layer and mask. Look on your layer in the layer palette...there should be a little chain between the two icons on the layer. If you click on the chain it will disappear which means you can move your layer around and not affect your mask placement. Click where the chain was and the chain will return, which means the layer and mask will be connected again. This is really useful if you select for example the outline of a word with a mask. By unlocking the mask you can move the image around within the letters without moving the letter placement.
|
|
|
|
05/02/2011 08:29:41 AM · #103 |
Originally posted by Judi:
Originally posted by vawendy:
another lesson:
When I was cloning onto a new layer, I used the eraser tool to erase the parts the areas where I cloned too much. Sometimes I erased too much, and then had to undo and try again. I had the brilliant plan of masking out the areas that were the overflow. That way if I masked out too much, I could just go back and change the brush color to white to fix it.
Brilliant!!
Except when I moved the ball, the mask didn't move with it. Not so brilliant of an idea. :( |
Yayyyy...that is what I have said a couple of times in this thread....mask the edges of your ball for a better result. And the reason the mask doesn't move is because you have unlocked the layer and mask. Look on your layer in the layer palette...there should be a little chain between the two icons on the layer. If you click on the chain it will disappear which means you can move your layer around and not affect your mask placement. Click where the chain was and the chain will return, which means the layer and mask will be connected again. This is really useful if you select for example the outline of a word with a mask. By unlocking the mask you can move the image around within the letters without moving the letter placement. |
You mean I should actually read the whole thread instead of skimming? :)
Actually, in looking at it now, the mask and layer were locked. However, I made the mistake of putting all the new balls on the same layer, instead of one layer/ball. Then I just used the selection tool and grabbed just one ball to move. Even though the layer and mask are locked, they don't move together when you select. You can move the mask or the ball, but I can't seem to move both.
I really should have used different layers per ball! |
|
|
|
05/02/2011 08:32:45 AM · #104 |
Originally posted by vawendy:
Originally posted by Judi:
Originally posted by vawendy:
another lesson:
When I was cloning onto a new layer, I used the eraser tool to erase the parts the areas where I cloned too much. Sometimes I erased too much, and then had to undo and try again. I had the brilliant plan of masking out the areas that were the overflow. That way if I masked out too much, I could just go back and change the brush color to white to fix it.
Brilliant!!
Except when I moved the ball, the mask didn't move with it. Not so brilliant of an idea. :( |
Yayyyy...that is what I have said a couple of times in this thread....mask the edges of your ball for a better result. And the reason the mask doesn't move is because you have unlocked the layer and mask. Look on your layer in the layer palette...there should be a little chain between the two icons on the layer. If you click on the chain it will disappear which means you can move your layer around and not affect your mask placement. Click where the chain was and the chain will return, which means the layer and mask will be connected again. This is really useful if you select for example the outline of a word with a mask. By unlocking the mask you can move the image around within the letters without moving the letter placement. |
You mean I should actually read the whole thread instead of skimming? :)
Actually, in looking at it now, the mask and layer were locked. However, I made the mistake of putting all the new balls on the same layer, instead of one layer/ball. Then I just used the selection tool and grabbed just one ball to move. Even though the layer and mask are locked, they don't move together when you select. You can move the mask or the ball, but I can't seem to move both.
I really should have used different layers per ball! |
Hmmm intersting...they should move together...I just tried it out in PS and they definitely move together...but you are right about one ball per layer...it gives you more freedom and control.
|
|
|
|
05/02/2011 08:44:07 AM · #105 |
Originally posted by Judi:
Originally posted by vawendy:
Originally posted by Judi:
Originally posted by vawendy:
another lesson:
When I was cloning onto a new layer, I used the eraser tool to erase the parts the areas where I cloned too much. Sometimes I erased too much, and then had to undo and try again. I had the brilliant plan of masking out the areas that were the overflow. That way if I masked out too much, I could just go back and change the brush color to white to fix it.
Brilliant!!
Except when I moved the ball, the mask didn't move with it. Not so brilliant of an idea. :( |
Yayyyy...that is what I have said a couple of times in this thread....mask the edges of your ball for a better result. And the reason the mask doesn't move is because you have unlocked the layer and mask. Look on your layer in the layer palette...there should be a little chain between the two icons on the layer. If you click on the chain it will disappear which means you can move your layer around and not affect your mask placement. Click where the chain was and the chain will return, which means the layer and mask will be connected again. This is really useful if you select for example the outline of a word with a mask. By unlocking the mask you can move the image around within the letters without moving the letter placement. |
You mean I should actually read the whole thread instead of skimming? :)
Actually, in looking at it now, the mask and layer were locked. However, I made the mistake of putting all the new balls on the same layer, instead of one layer/ball. Then I just used the selection tool and grabbed just one ball to move. Even though the layer and mask are locked, they don't move together when you select. You can move the mask or the ball, but I can't seem to move both.
I really should have used different layers per ball! |
Hmmm intersting...they should move together...I just tried it out in PS and they definitely move together...but you are right about one ball per layer...it gives you more freedom and control. |
They're not on mine... When I select a ball, what moves depends on what is selected. If the layer part is selected, the ball moves, if I click on the mask part (in the layers palette) the mask moves. I can't seem to select both the layer and the mask so that they move together... |
|
|
|
05/02/2011 09:18:23 AM · #106 |
Here is my edit from Lesson2, Painting:
 |
|
|
|
05/02/2011 09:33:56 AM · #107 |
I decided to start at lesson 2. Judi do you usually work on small size image?
Lesson 2
Thanks Judi for sharing..!
|
|
|
|
05/02/2011 09:37:59 AM · #108 |
hi judi
i do not find the source to download the images in hi res
i tried to copy from dpc but got only a gif. thanks for ur help
Which images are you looking for?
All the images concerning the lessons. |
|
|
|
05/02/2011 09:42:32 AM · #109 |
Originally posted by amnon:
hi judi
i do not find the source to download the images in hi res
i tried to copy from dpc but got only a gif. thanks for ur help
Which images are you looking for?
All the images concerning the lessons. |
On the images she has linked, on that page, lower left, see a clickable link to "view full size image" � click that and get the hi-res version.
R.
Message edited by author 2011-05-02 09:44:41. |
|
|
|
05/02/2011 09:48:10 AM · #110 |
Originally posted by amnon:
hi judi
i do not find the source to download the images in hi res
i tried to copy from dpc but got only a gif. thanks for ur help
Which images are you looking for?
All the images concerning the lessons. |
I was having the same problem - some of the pictures weren't displaying the view at full size link like Bear Music was talking about. If you're looking for the pictures of the little guy, she created a zip file link. If you go back in the thread it's right about the "duck" pictures. I have the ball one and the umbrella one too that I could email to you if you're still having troubles. Just fire me a pm with your email if you need them. |
|
|
|
05/02/2011 04:03:04 PM · #111 |
Judi i cannot seem to get your third lesson images to load into photoshop, i keep getting an error message that they are not compatible files. I have downloaded the zip \nd tried straight from the thread.
Bit stuck, can you help? |
|
|
|
05/02/2011 04:44:45 PM · #112 |
 Hot_Pixel - Nice work. Good neat edges. Hot_Pixel - Nice work. Good neat edges.
lobrin - Nice work. Your edges are clean. I would use a 50% opacity brush around the edge of her lips to make the colour more natural...apart from that...good work. No I don't usually work on small images...always hi-res. But as some of my PSD files do get big, for the lessons I am keeping them small as they will increase in size as we go. I am aware that not everyone has a powerful computer and I would like them to have the chance to learn as well. :)
|
|
|
|
05/02/2011 04:45:58 PM · #113 |
Originally posted by Jon_H:
Judi i cannot seem to get your third lesson images to load into photoshop, i keep getting an error message that they are not compatible files. I have downloaded the zip \nd tried straight from the thread.
Bit stuck, can you help? |
Jon_H...silly question, but have you opened the zip folder first?
|
|
|
|
05/02/2011 04:55:47 PM · #114 |
Originally posted by amnon:
hi judi
i do not find the source to download the images in hi res
i tried to copy from dpc but got only a gif. thanks for ur help
Which images are you looking for?
All the images concerning the lessons. |
Here they all are. They are reduced size but still large enough for you to work on. I have added these links to the opening post on this thread. You will need to unzip the images for Lesson 3.
Lesson 1
Cat image 1 - cat image 2
Lesson 2
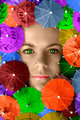
Umbrella image - Ball image
Lesson 3
Images for ive been framed image.
|
|
|
|
05/02/2011 04:57:15 PM · #115 |
|
|
|
05/02/2011 05:02:34 PM · #116 |
gadion - Nice work on all of those lessons. You are picking it up quick.
Jon_H - If you are still having trouble while I'm away, I have uploaded each one to my website. Click on the link below and when the folder loads click on each one individually. When it opens right-click and save as. I hope that helps.
I've been framed images
Message edited by author 2011-05-02 17:02:54.
|
|
|
|
05/02/2011 05:06:46 PM · #117 |
| Did you make another PDF to go with "Lesson Three"? I planned to look at those later, since I don't have time to do this right now. If not, I can just print this thread to a PDF myself and use that. |
|
|
|
05/02/2011 05:15:58 PM · #118 |
Originally posted by GeneralE:
Did you make another PDF to go with "Lesson Three"? I planned to look at those later, since I don't have time to do this right now. If not, I can just print this thread to a PDF myself and use that. |
I haven't as yet. I probably won't get a chance to until after I finish this shoot in a couple of days. I leave in an hours time. If you do happen to put it into a PDF can you load a link to it in here for the others. Actually I wonder if we can get these lessons and tips added to the tutorials of the site so they will be even easier to find as my original post is getting a tad long.
|
|
|
|
05/02/2011 05:32:47 PM · #119 |
| Judi, I read through the lessons and will work on them as I can. However, alot of work goes into preparing such instructions and also providing the examples. Thank you very much for offering the lessons so generously. |
|
|
|
05/02/2011 05:33:45 PM · #120 |
Originally posted by Judi:
Originally posted by Jon_H:
Judi i cannot seem to get your third lesson images to load into photoshop, i keep getting an error message that they are not compatible files. I have downloaded the zip \nd tried straight from the thread.
Bit stuck, can you help? |
Jon_H...silly question, but have you opened the zip folder first? |
No not a silly question, i made a schoolboy error and didnt extract the images... duh. ive got them now. Thanks. |
|
|
|
05/02/2011 05:42:34 PM · #121 |
 hihosilver - No worries...if you have any difficulties understanding any part, please don't hesitate to ask. I know these lessons sound very basic, but they are crucial to this type of editing. If you don't know how to use your layers, masks and blend modes...then you just won't be able to get there. hihosilver - No worries...if you have any difficulties understanding any part, please don't hesitate to ask. I know these lessons sound very basic, but they are crucial to this type of editing. If you don't know how to use your layers, masks and blend modes...then you just won't be able to get there.
Jon_H - Yayyy..I'm so glad.
|
|
|
|
05/02/2011 08:23:45 PM · #122 |
Judi,
I'm getting a late start, but I'm want to learn. I can't open the images from lesson 1 or 2, but I can for lesson 3. Help! |
|
|
|
05/02/2011 08:36:21 PM · #123 |
All of the pictures are provided in links in the opening post on the thread.
If that doesn't work, send my your email in a pm and I'll send them to you.
Message edited by author 2011-05-02 20:37:34. |
|
|
|
05/02/2011 08:38:32 PM · #124 |
Originally posted by Shanny403:
All of the pictures are provided in links in the opening post on the thread. |
Thanks, but I can't open those either. I get a page that says that I don't have access. |
|
|
|
05/02/2011 08:39:44 PM · #125 |
This is the error message I get:
Forbidden
You don't have permission to access /dpctutoring/lessons/cat.jpg on this server.
Additionally, a 404 Not Found error was encountered while trying to use an ErrorDocument to handle the request.
Apache/1.3.42 Server at judigraphics.com Port 80 |
|
Home -
Challenges -
Community -
League -
Photos -
Cameras -
Lenses -
Learn -
Prints! -
Help -
Terms of Use -
Privacy -
Top ^
DPChallenge, and website content and design, Copyright © 2001-2024 Challenging Technologies, LLC.
All digital photo copyrights belong to the photographers and may not be used without permission.
Current Server Time: 04/24/2024 01:58:43 AM EDT.


